Cloudflare for WordPress: the complete beginners guide
Exploring the benefits of Cloudflare is an excellent method to improve the performance and security of your website. Cloudflare’s top-notch features accelerate your site while also protecting it from numerous web attacks. Let’s look at the primary benefits and how Cloudflare may improve your online visibility.
Imagine you’re running a business website that attracts customers from around the world. You want your website to be fast, secure from hackers, and always available, even if there’s a sudden surge in visitors.
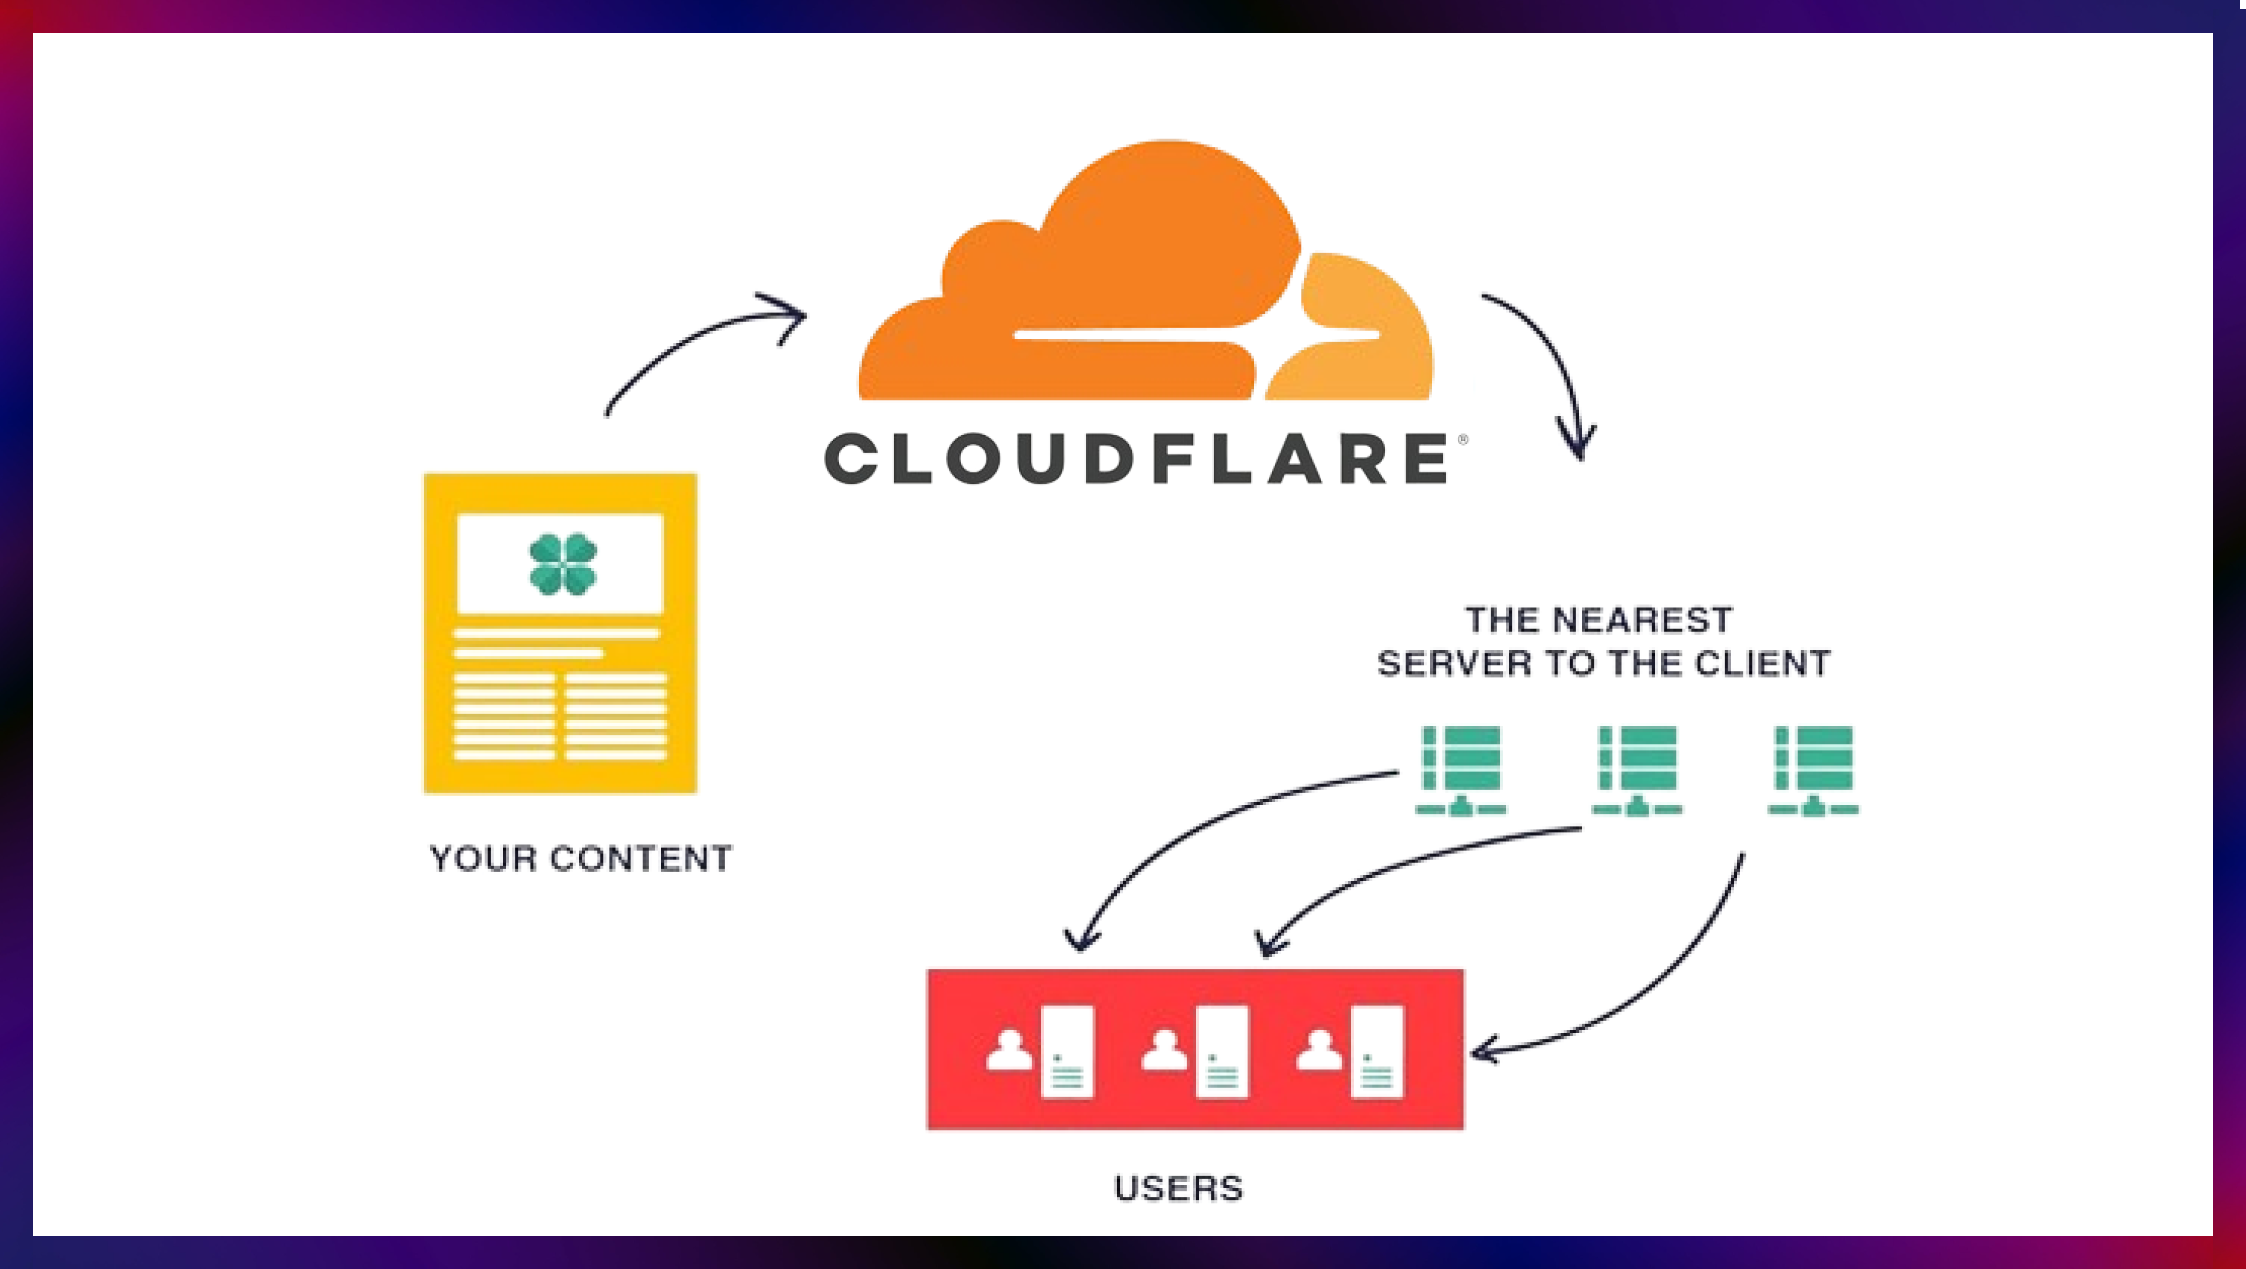
Cloudflare helps you achieve this. It acts as a protective and efficient middleman (aka proxy) between your website and its visitors. Cloudflare stores copies of your website (aka caching) in multiple locations globally, so it loads quickly for anyone, anywhere. It also filters out malicious traffic to prevent attacks, ensuring your website is safe and accessible to your real customers at all times.
We’ll understand how Cloudflare does this and how to implement it for your own WordPress website in the following article.
What is Cloudflare?
Cloudflare is the popular “reverse proxy” and “content delivery network (CDN)” for WordPress. Let us quickly understand what do these terms mean and how are they related to Cloudflare.
At the base is Reverse Proxy, a server that forwards requests from clients to other servers (the origin servers where the websites are hosted) and returns responses to the clients. It can provide additional features like load balancing, security, and caching.
A step above is Content Delivery Networks or CDNs, a network of reverse proxy servers distributed globally. As discussed briefly in the introduction, a CDN’s main goal is to store copies of your site’s static content on its distributed server network. Now when someone accesses your site from halfway around the world, the request is routed to the nearest feasible CDN server and not your original website server, lowering latency and providing information faster.
And finally, Cloudflare integrates both these technologies into a comprehensive web performance and security service. It offers a CDN to cache and deliver content quickly across the globe. As a reverse proxy, it also provides security services like DDoS protection and traffic filtering.
How to Setup Cloudflare on your WordPress website?
Now that we have understood the basics of Cloudflare let us figure out how to setup Cloudflare on your website. There are three methods you can use:
- Using Cloudflare Console: Hard to setup and manage
- Using Cloudflare Plugin: Easy to setup, but hard to manage
- Using Cloudphant: Easy to setup and manage
Setup using Cloudflare console
Sign-up for your Cloudflare account
- Go to the Cloudflare website.
- Click on the “Sign Up” or “Get Started” button
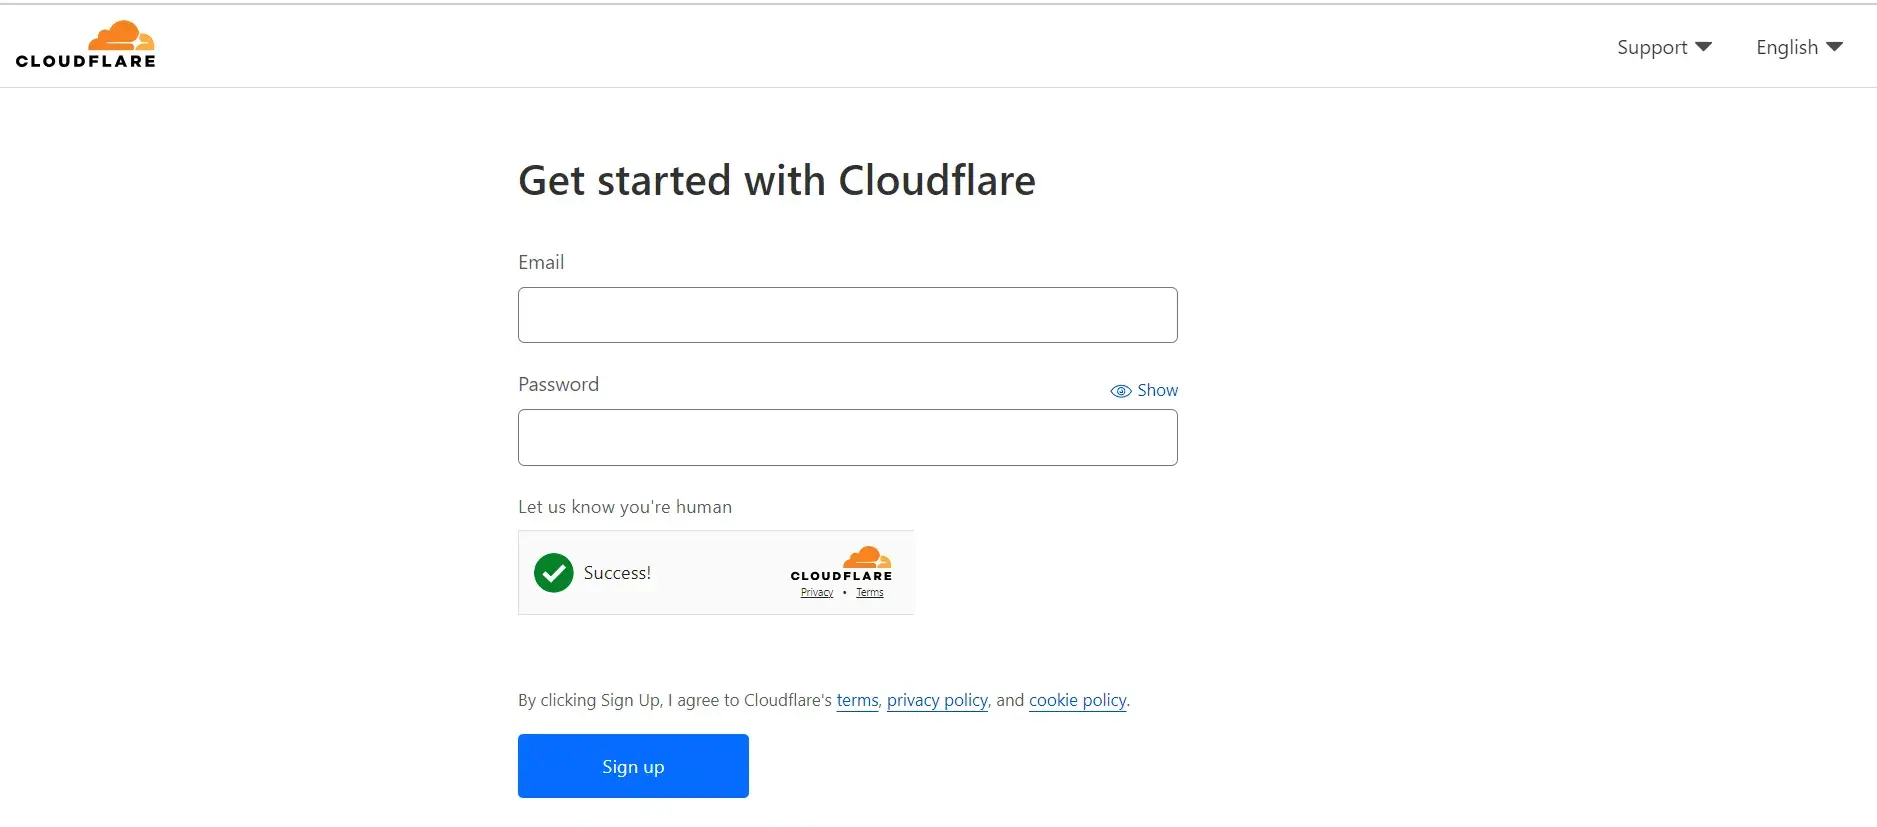
- Fill out the required fields, including your email address and a strong password.
- Check your email inbox for a verification email from Cloudflare.
- Click on the verification link provided in the email to confirm your account.
- Complete any additional steps prompted by Cloudflare for account setup, such as setting up two-factor authentication if desired.
- Once your account is verified, log in to your Cloudflare account using your credentials.
Add your website to your Cloudflare account
- After logging in to your Cloudflare account, you’ll be directed to your dashboard.
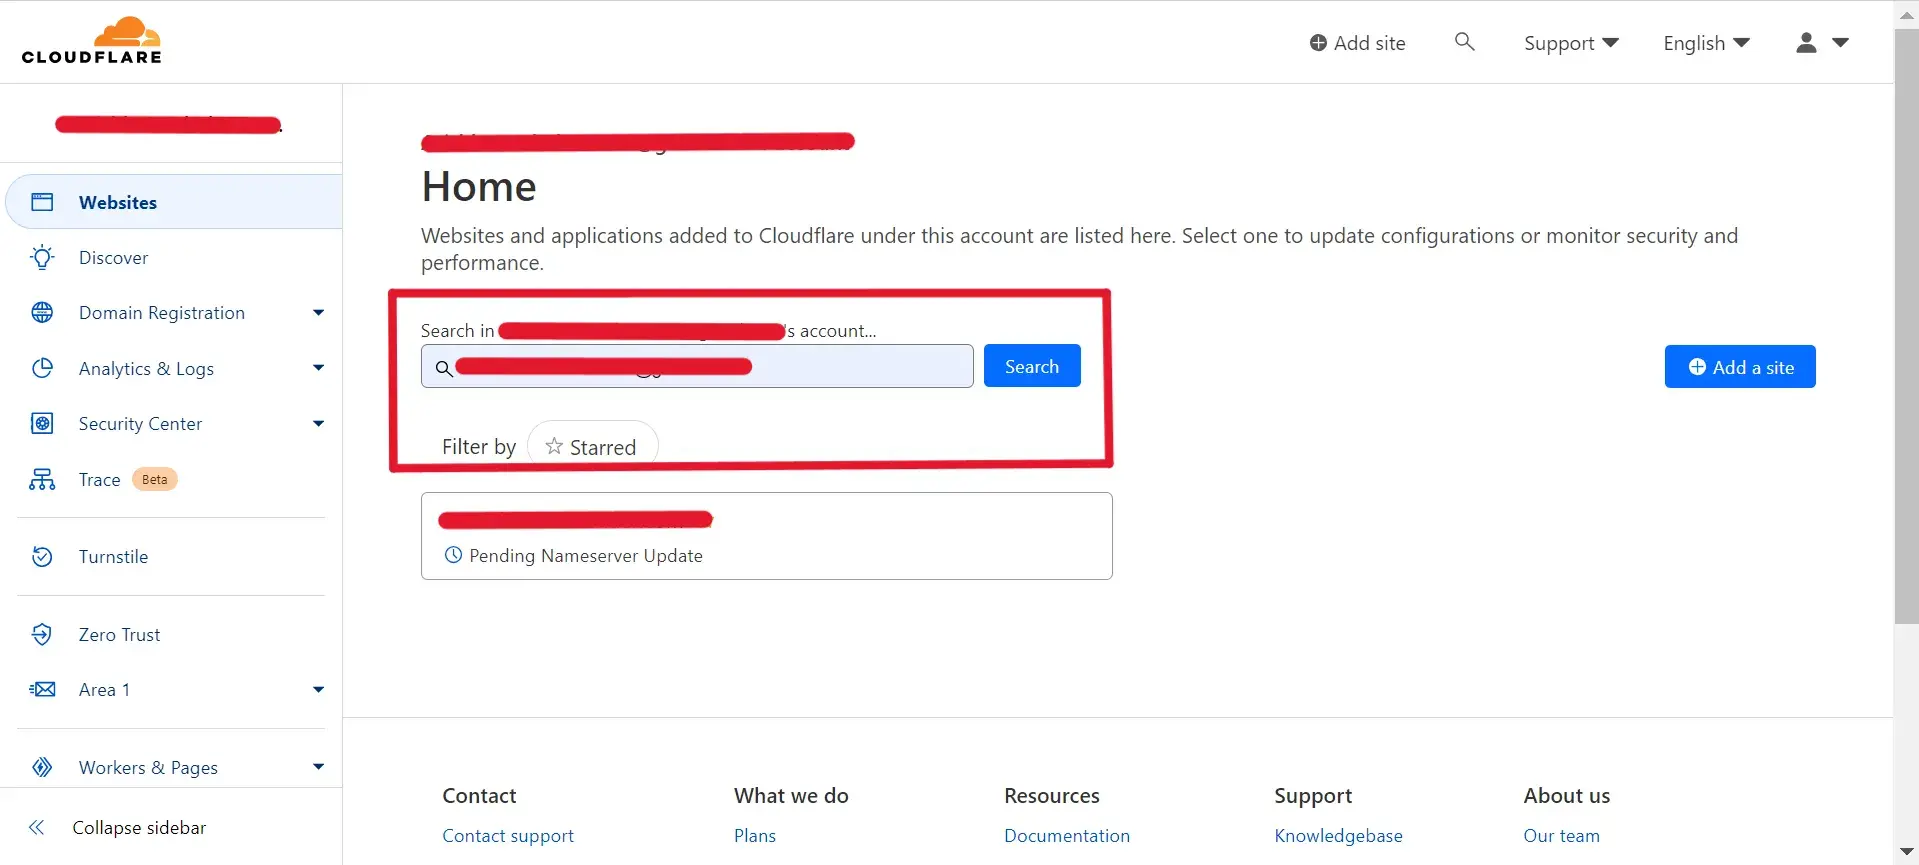
- Click on the “Add a Site” button located in the top right corner of the dashboard.

- Enter your WordPress site’s domain name (e.g., www.yourwordpresssite.com)
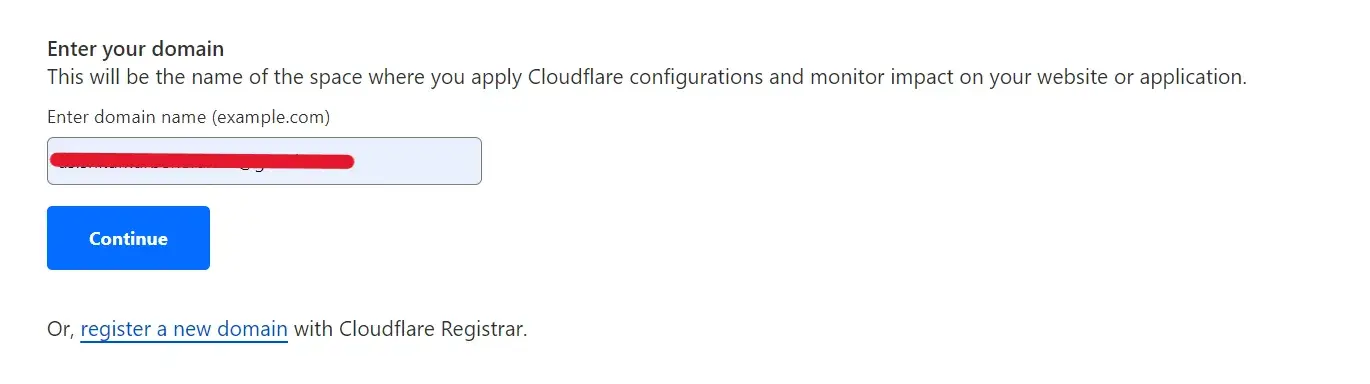
- Click on the “Begin Scan” button to allow Cloudflare to scan your existing DNS records.
- Follow the on-screen instructions provided by Cloudflare to complete the scanning process.
- Once the scan is complete, Cloudflare will display a summary of your DNS records
Configure DNS Settings
- Cloudflare will provide you with new name servers for your domain.

- Log in to your domain registrar’s website (where you purchased your domain).
- Locate the DNS settings or nameservers section within your domain registrar’s control panel.
- Replace your current nameservers with the ones provided by Cloudflare. It may take some time (usually up to 48 hours) for the DNS changes to propagate across the internet.
- Once the DNS changes have propagated, all traffic to your domain will be routed through Cloudflare for optimized performance and security
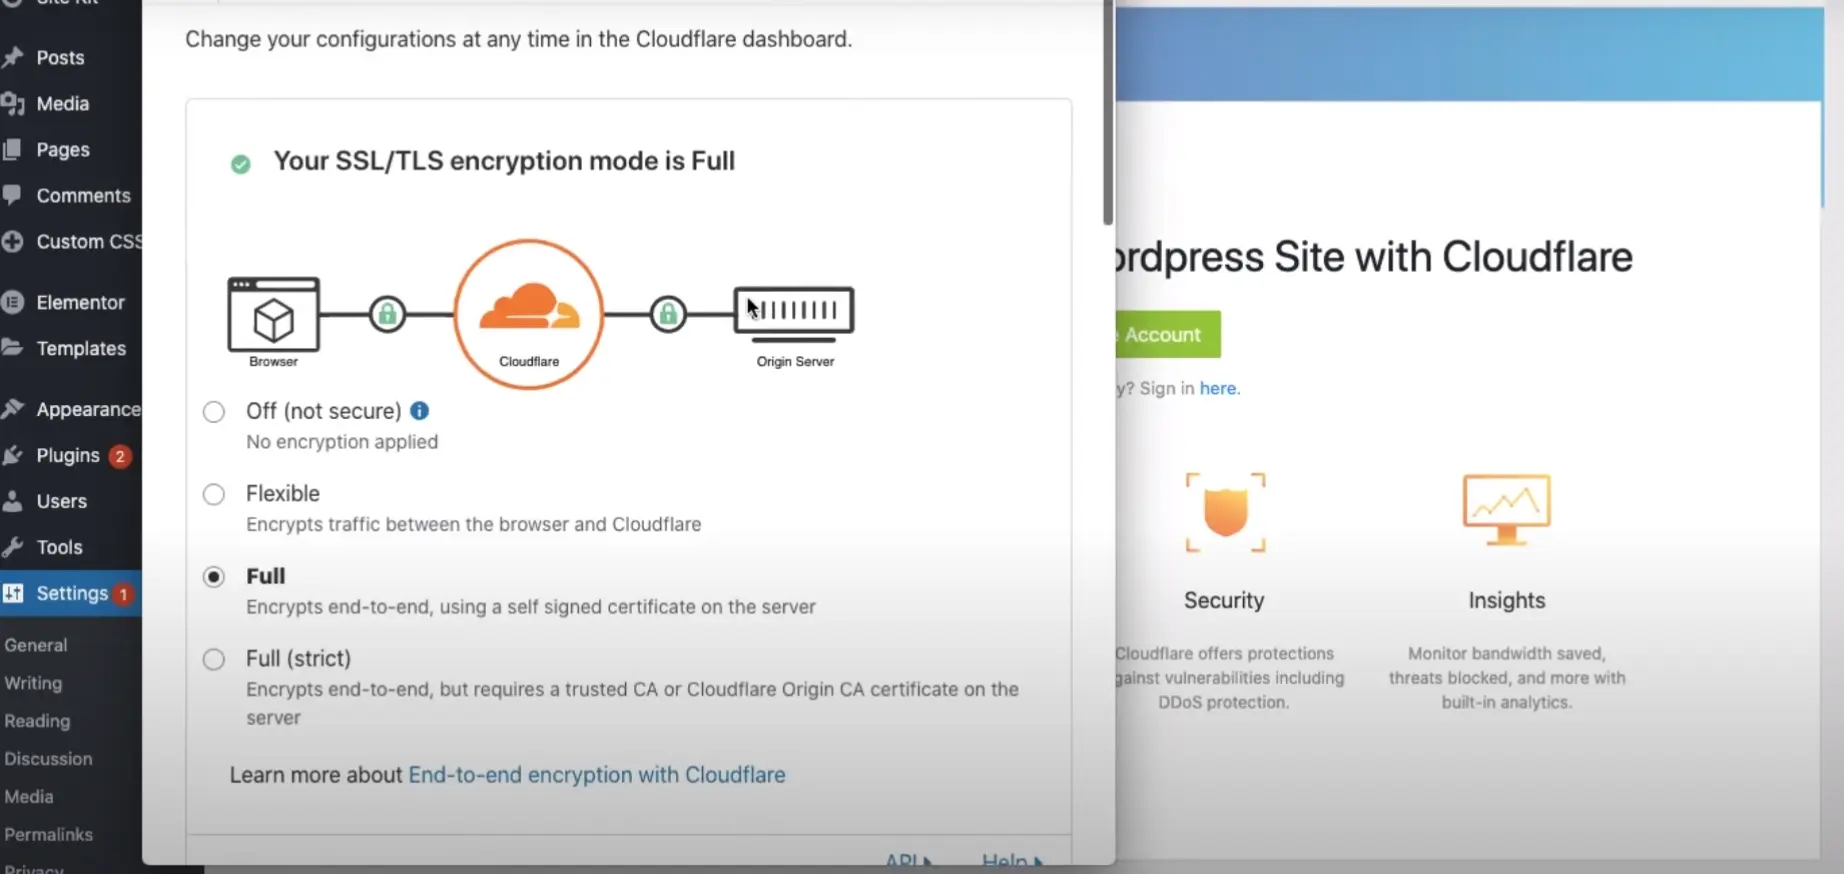
SSL Configuration
- In your Cloudflare dashboard, navigate to the SSL/TLS section.
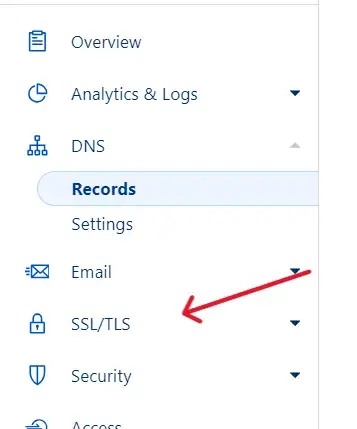
- Choose the SSL/TLS encryption level that suits your WordPress site’s needs (e.g., Flexible, Full, Full (Strict))
- Ensure that SSL/TLS encryption is enabled to secure data transmission between your server and visitors, positively impacting SEO rankings

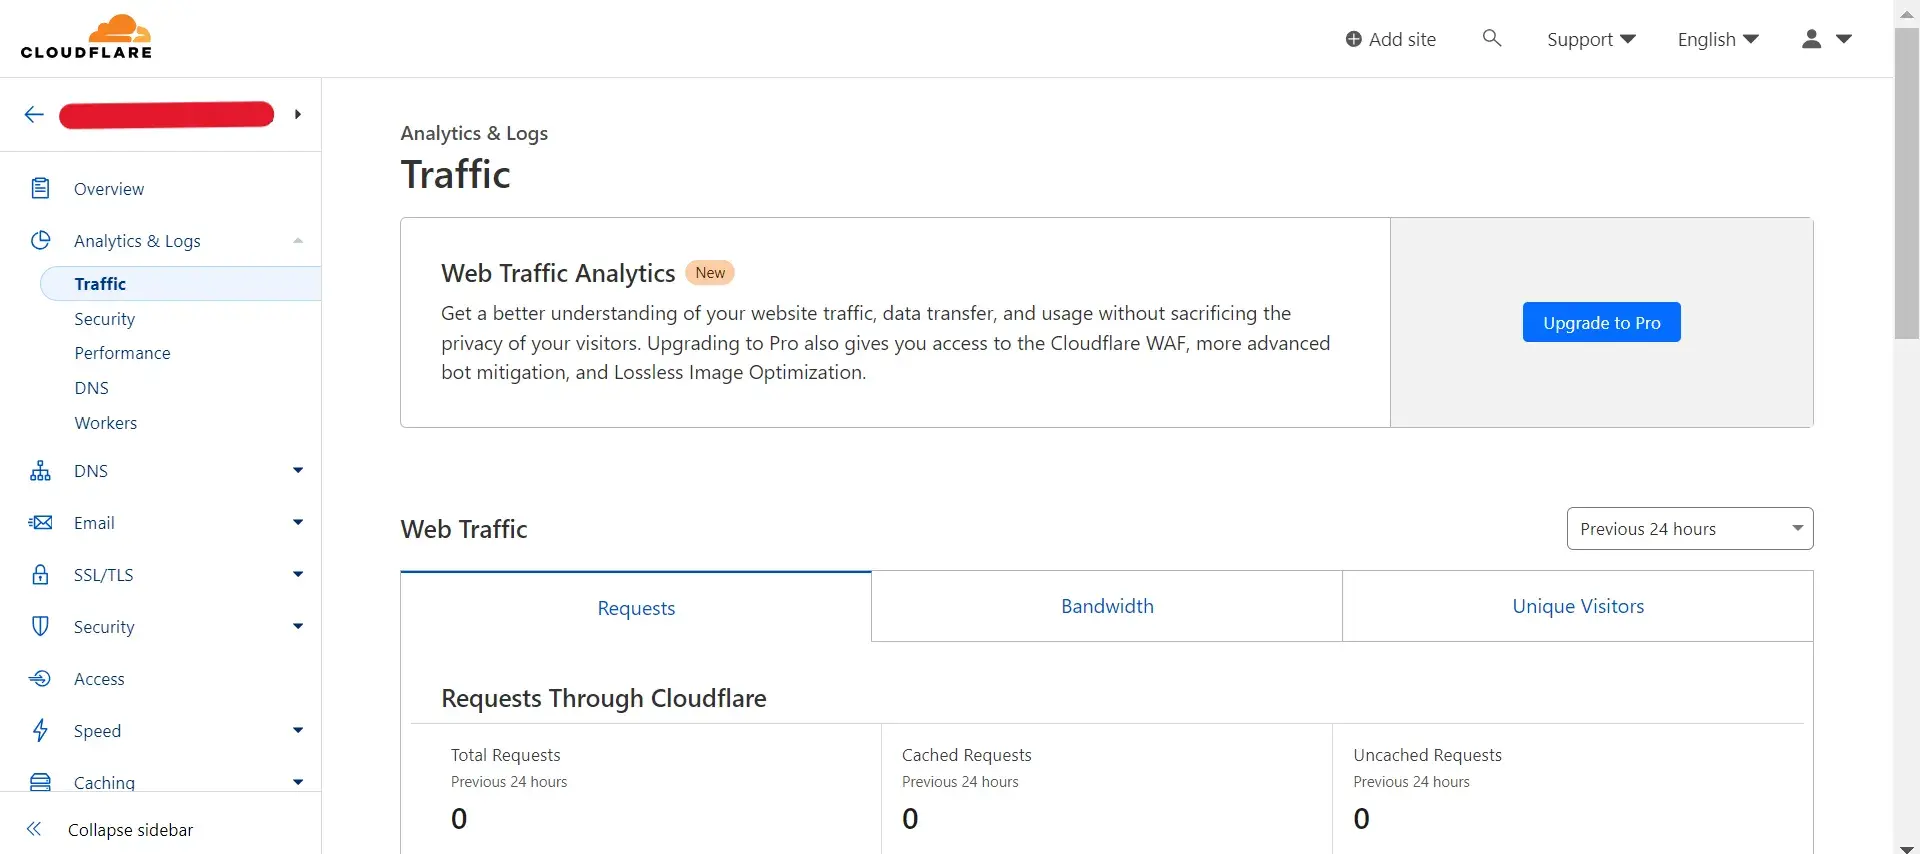
Fine Tune Cloudflare settings:
- Explore Cloudflare’s dashboard to customize settings tailored to your WordPress site’s needs
- Adjust settings such as caching, firewall rules, and threat control to optimize performance and security.
- Experiment with different configurations to find the best setup for your WordPress site
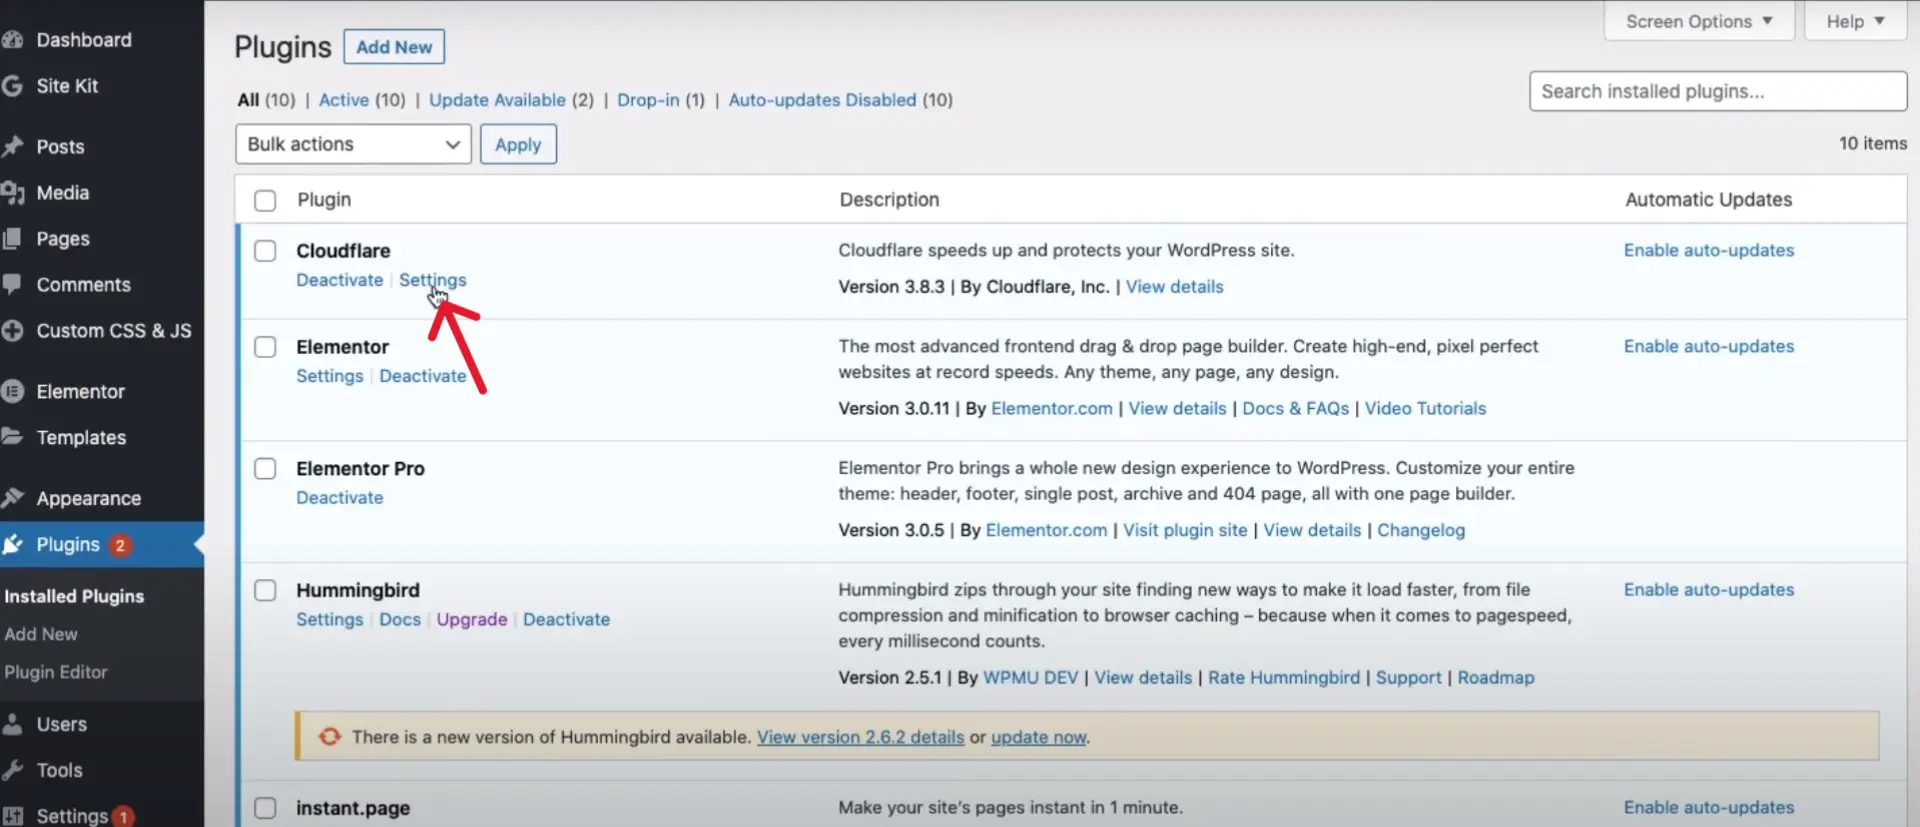
Setup using Cloudflare plugin
Install and activate Cloudflare plugin
- Visit the WordPress plugin repository and install the Cloudflare plugin
- Activate the plugin and navigate to Settings > Cloudflare
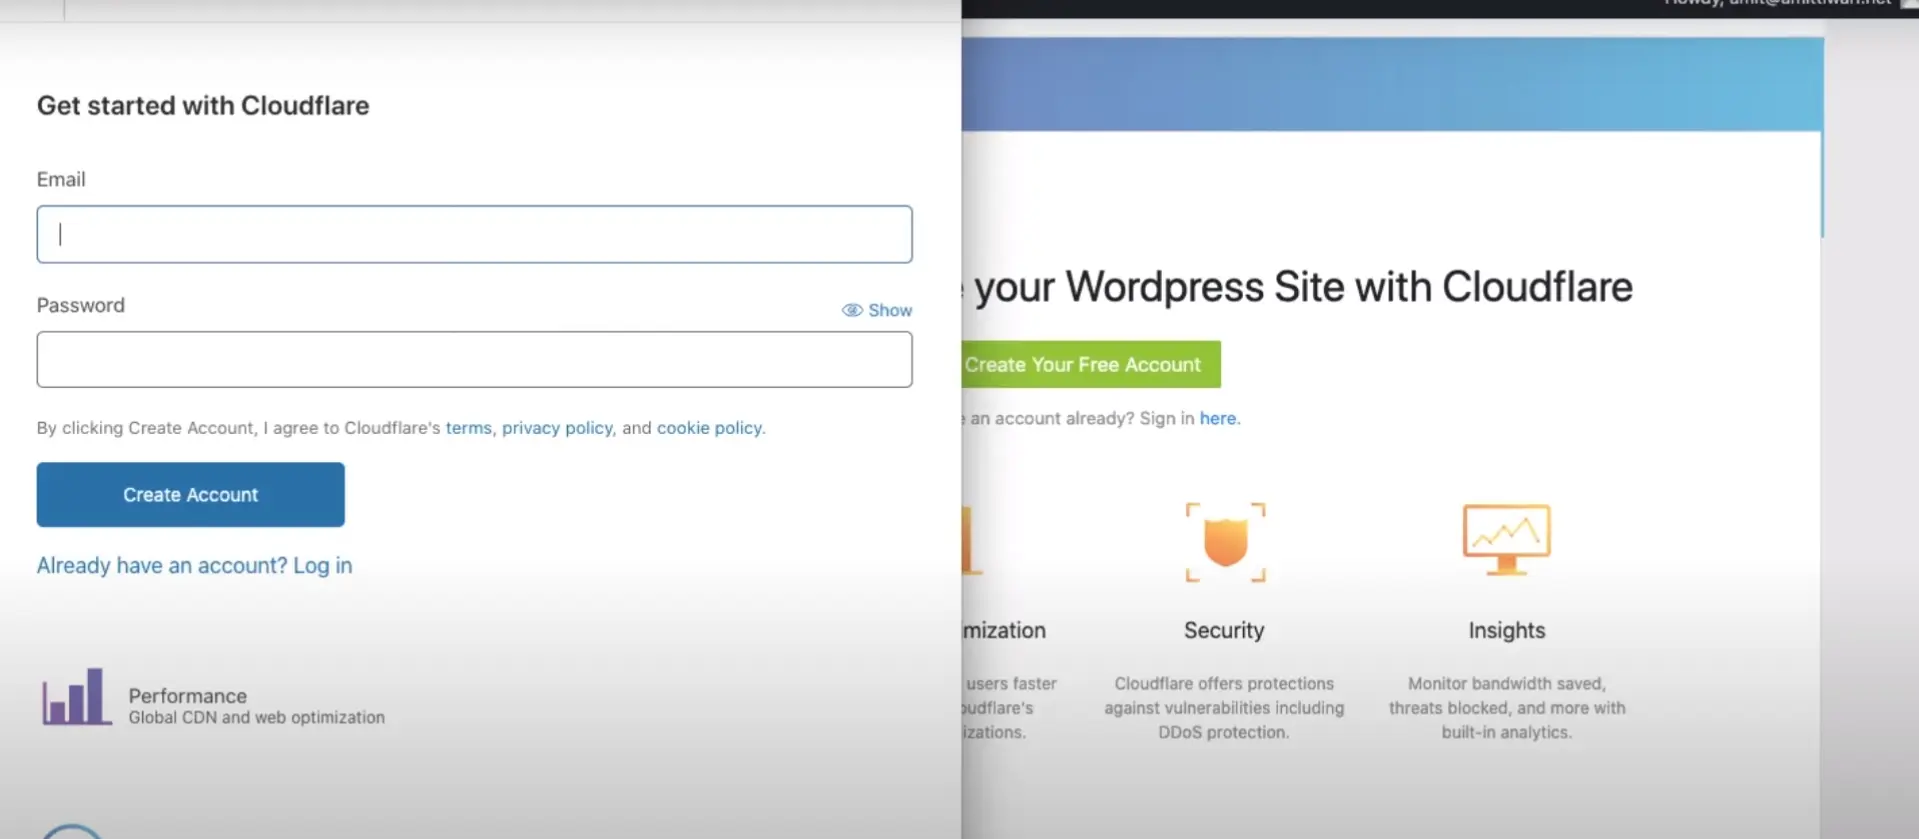
- Next you will either need to sign-up to your existing Cloudflare account or create a new account. Let us try to create a new account.
- You’ll need to enter your email address, password and website address in the next step.
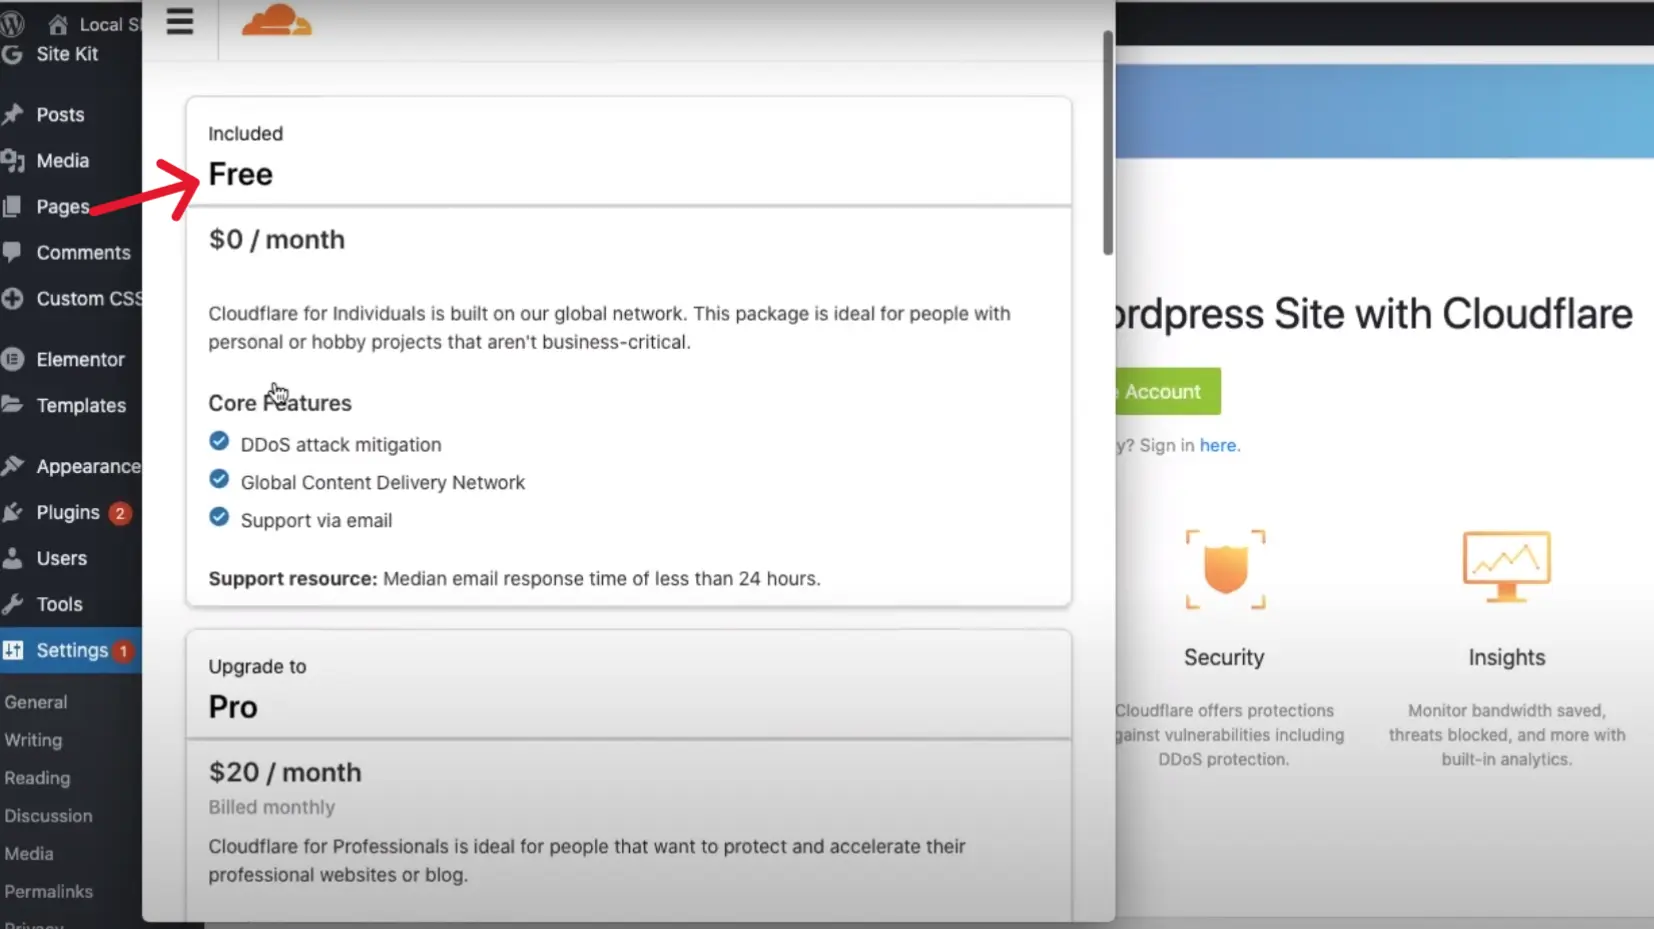
- Next Cloudflare will ask you to choose a plan. We’ll stick to the free plan.
- Next Cloudflare will check all DNS record for that domain name. Scroll to the bottom and click on Continue.
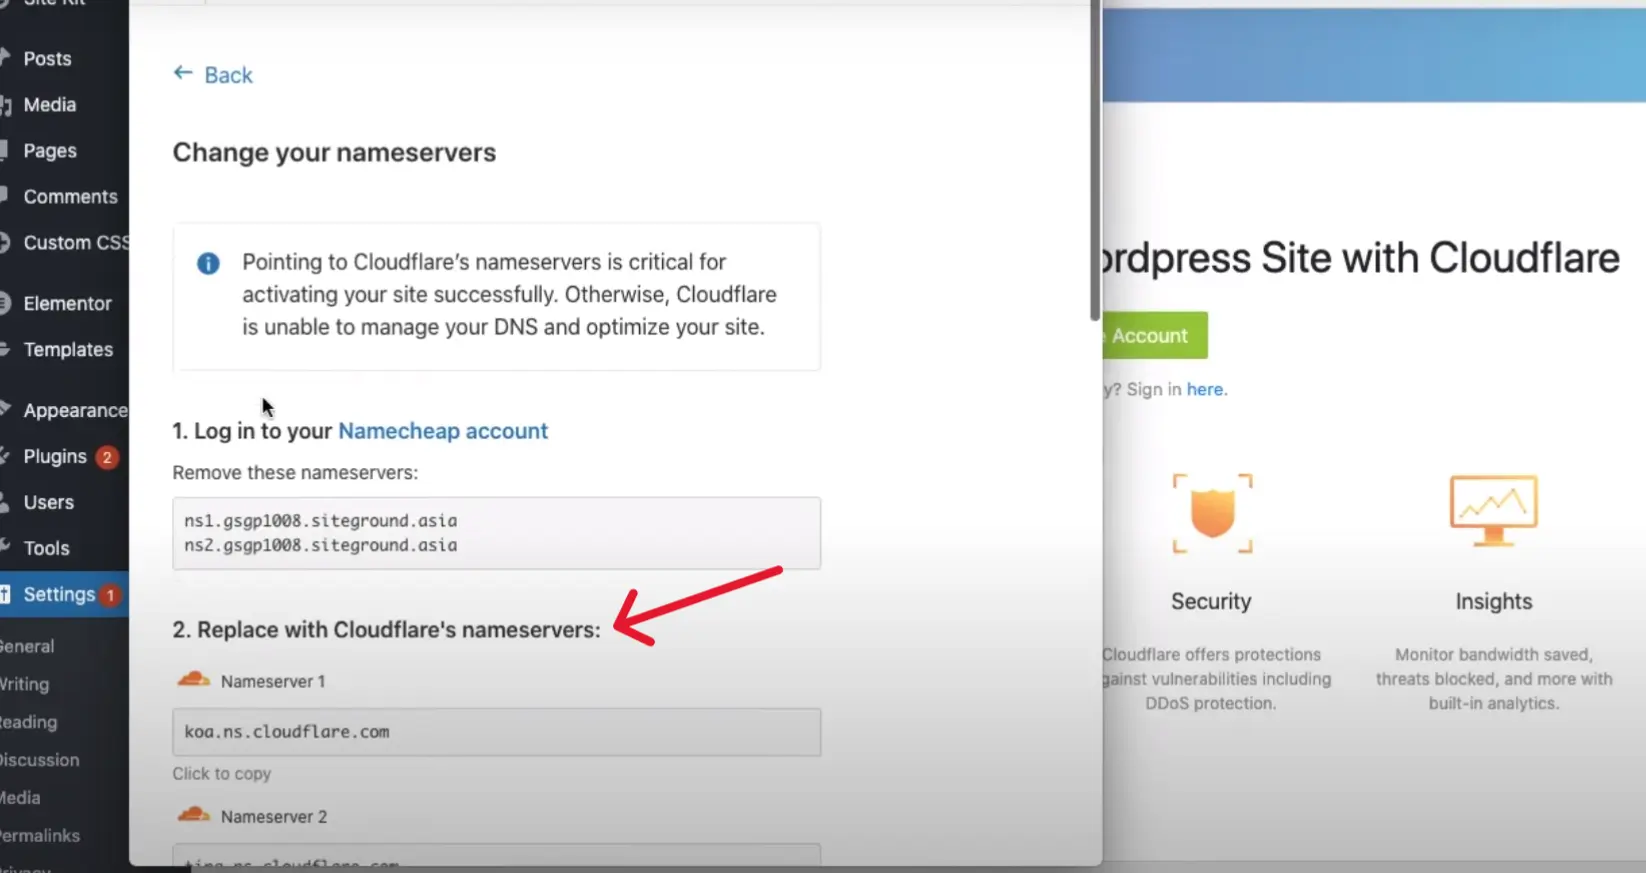
- Now like in the previous method you will need to replace your current name servers with the ones provided by Cloudflare. Click “Check Name Server”
- For your SSL/TLS encryption select “Full mode”. Select “On” on Always Use HTTPS option. Auto Minify HTML, CSS and JS and Switch on Brotli compression. Select Done.
- Please ensure that none of these option are activated using another plugin as that could cause a conflict and break your website.
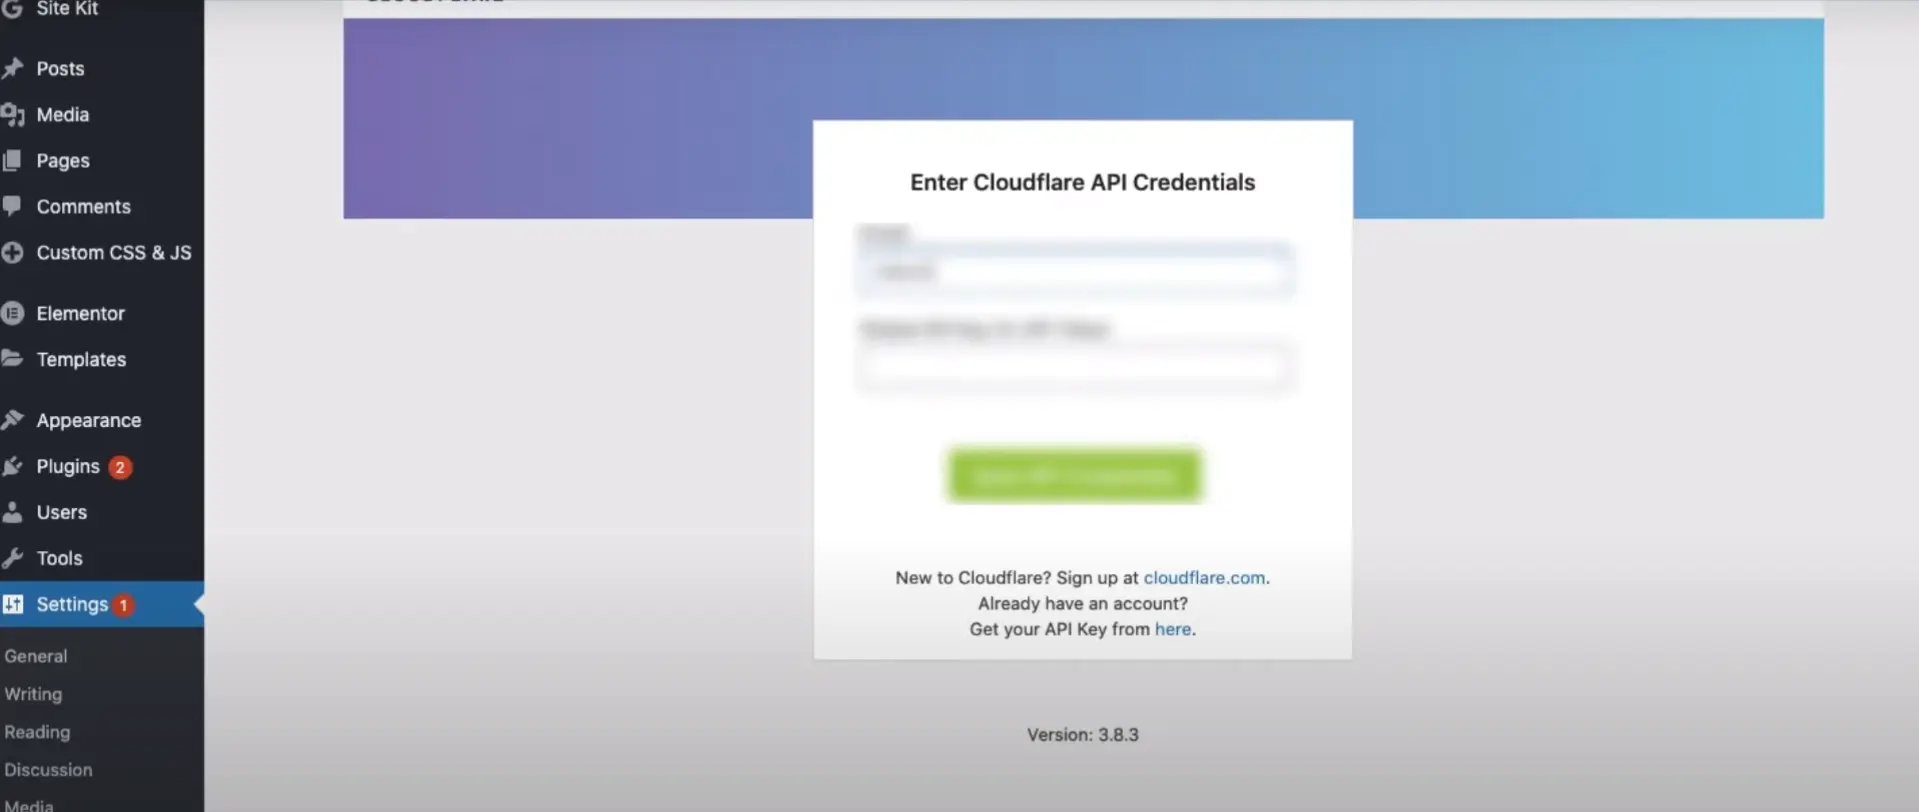
- Now close the pop-up window and go back to the Cloudflare option on your WordPress dashboard. Click login.
- You will be asked to enter your Cloudflare email id and API key. You can find the API key on your Cloudflare dashboard.
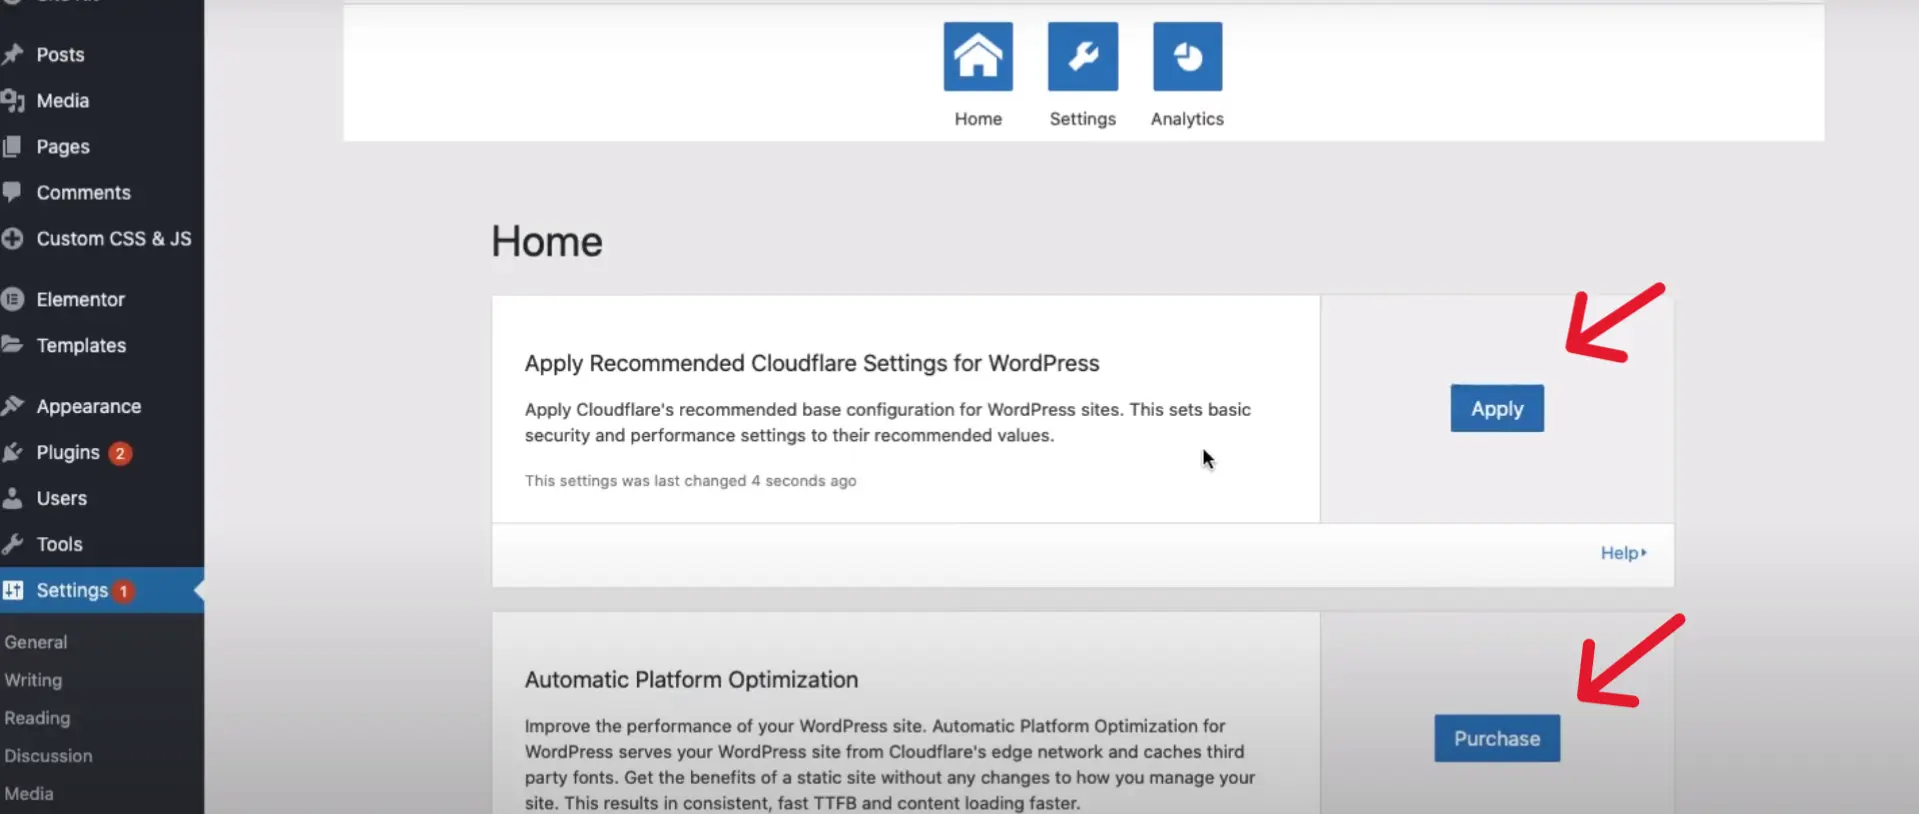
- Next you can quickly apply the recommend settings and Turn on the Automatic Platform Optimization if you are on a paid Cloudflare plan.
This is the most commonly used approach. But like every other plugin this create a management overhead.
You will need to ensure the Cloudflare plugin settings do not conflict with other plugins. You need to make sure that the plugin is update constantly and that those updates are compatible with the rest of your website code. To solve these issue we highly recommend using Zero Plugin Cloudflare Optimization from Cloudphant platform.
Setup using Cloudphant platform
Integrate your Cloudflare with Cloudphant
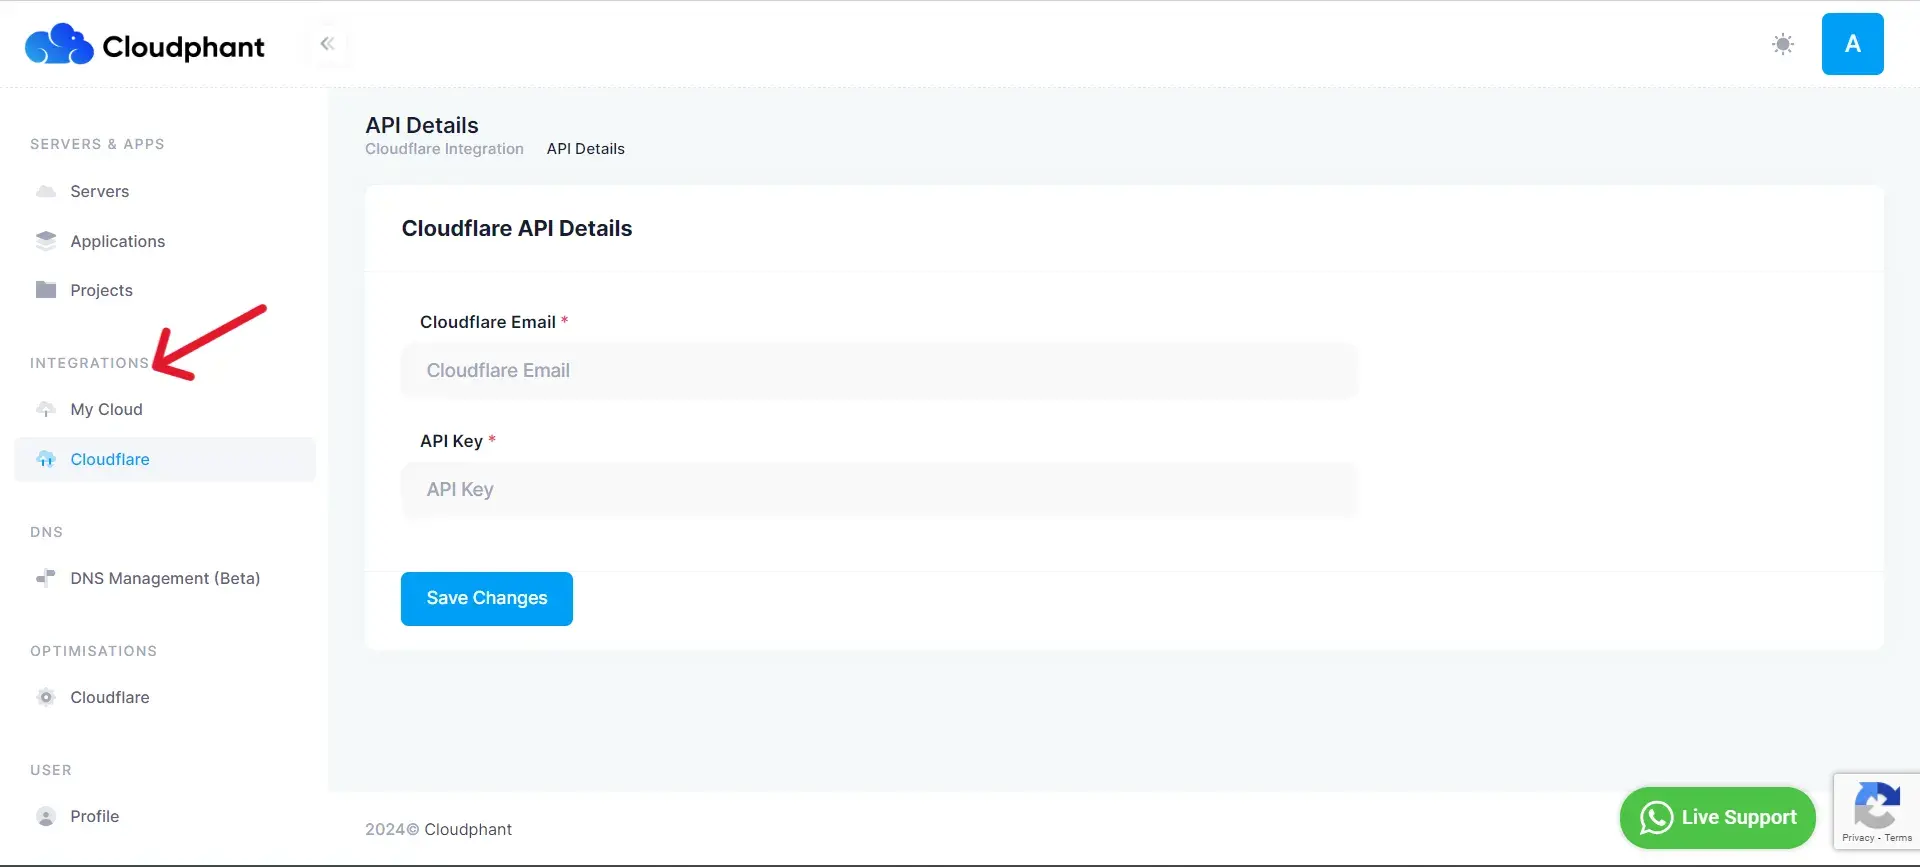
- To setup Cloudflare with Cloudphant, you will first need to sign in to your Cloudphant account.
- Next, on the left menu bar select Cloudflare under integrations.
- You will asked to enter your Cloudflare email id and API key.
- Next, on the left menu bar select Cloudflare under optimisations
- Select Add Domain and enter you website address.
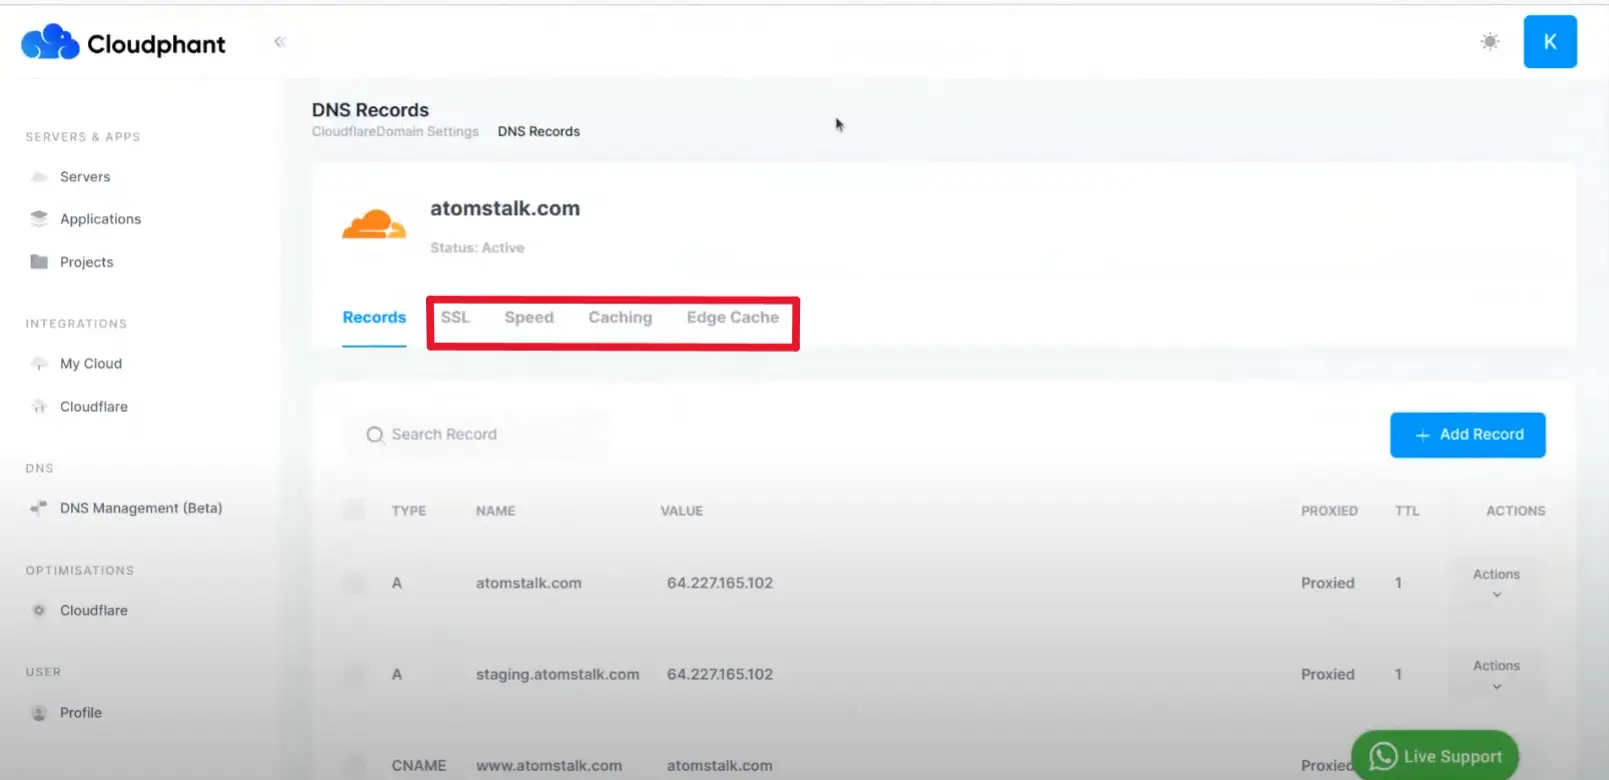
- You should see a screen as below. Go to the actions menu under DNS records and choose Add/Edit record
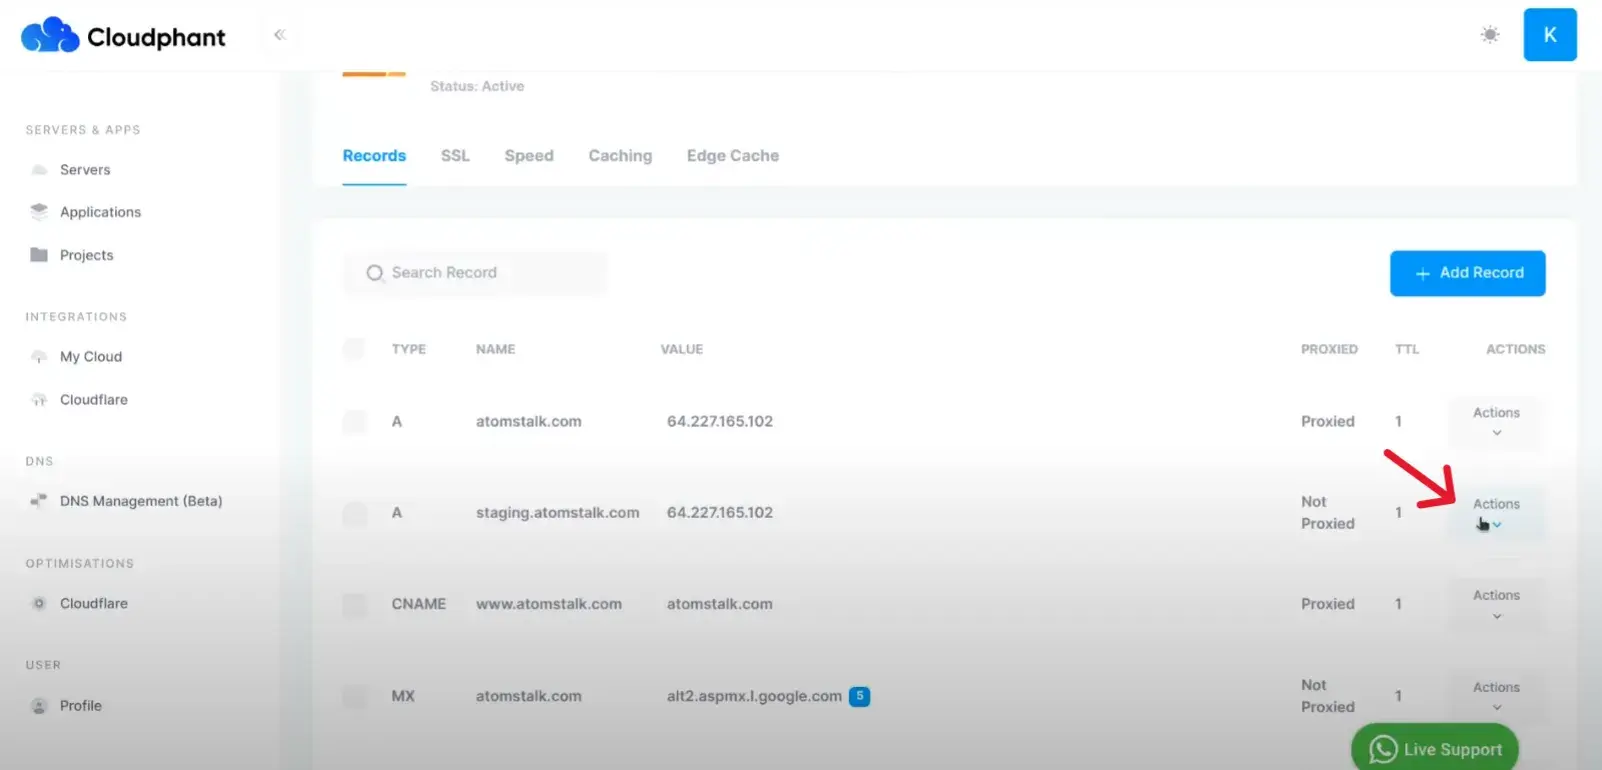
- Toggle the proxy and click submit. You’re done!
- See how easy it is to install Cloudflare CDN on your website with just a few clicks. Out of all the settings Cloudflare offers we’ve filtered out the handful that are useful for WordPress
- You can easily configure and experiment with them on your site without any hassle.
Conclusion
Overall we highly recommend using Cloudflare for your WordPress website. And hence we’ve deeply integrated their technology into our platform and customer wesbites. If your budget permits our recommendation is to go for $5 per month paid plan of Cloudflare.
While there are many options of CDNs, the reach, support and cost offered by Cloudflare continues to be the best in the industry. Which is why as of 2024 Cloudflare is used by over 7.5 Million websites globally, including 30% of Fortune 1000 organisation.