
This guide makes it easy for beginners to follow step-by-step, even if you don’t have any coding experience. So, let’s get started!
Step 1: Sign Up for AWS and Set Up Your Account
- Go to the AWS homepage and click “Create an AWS account.”
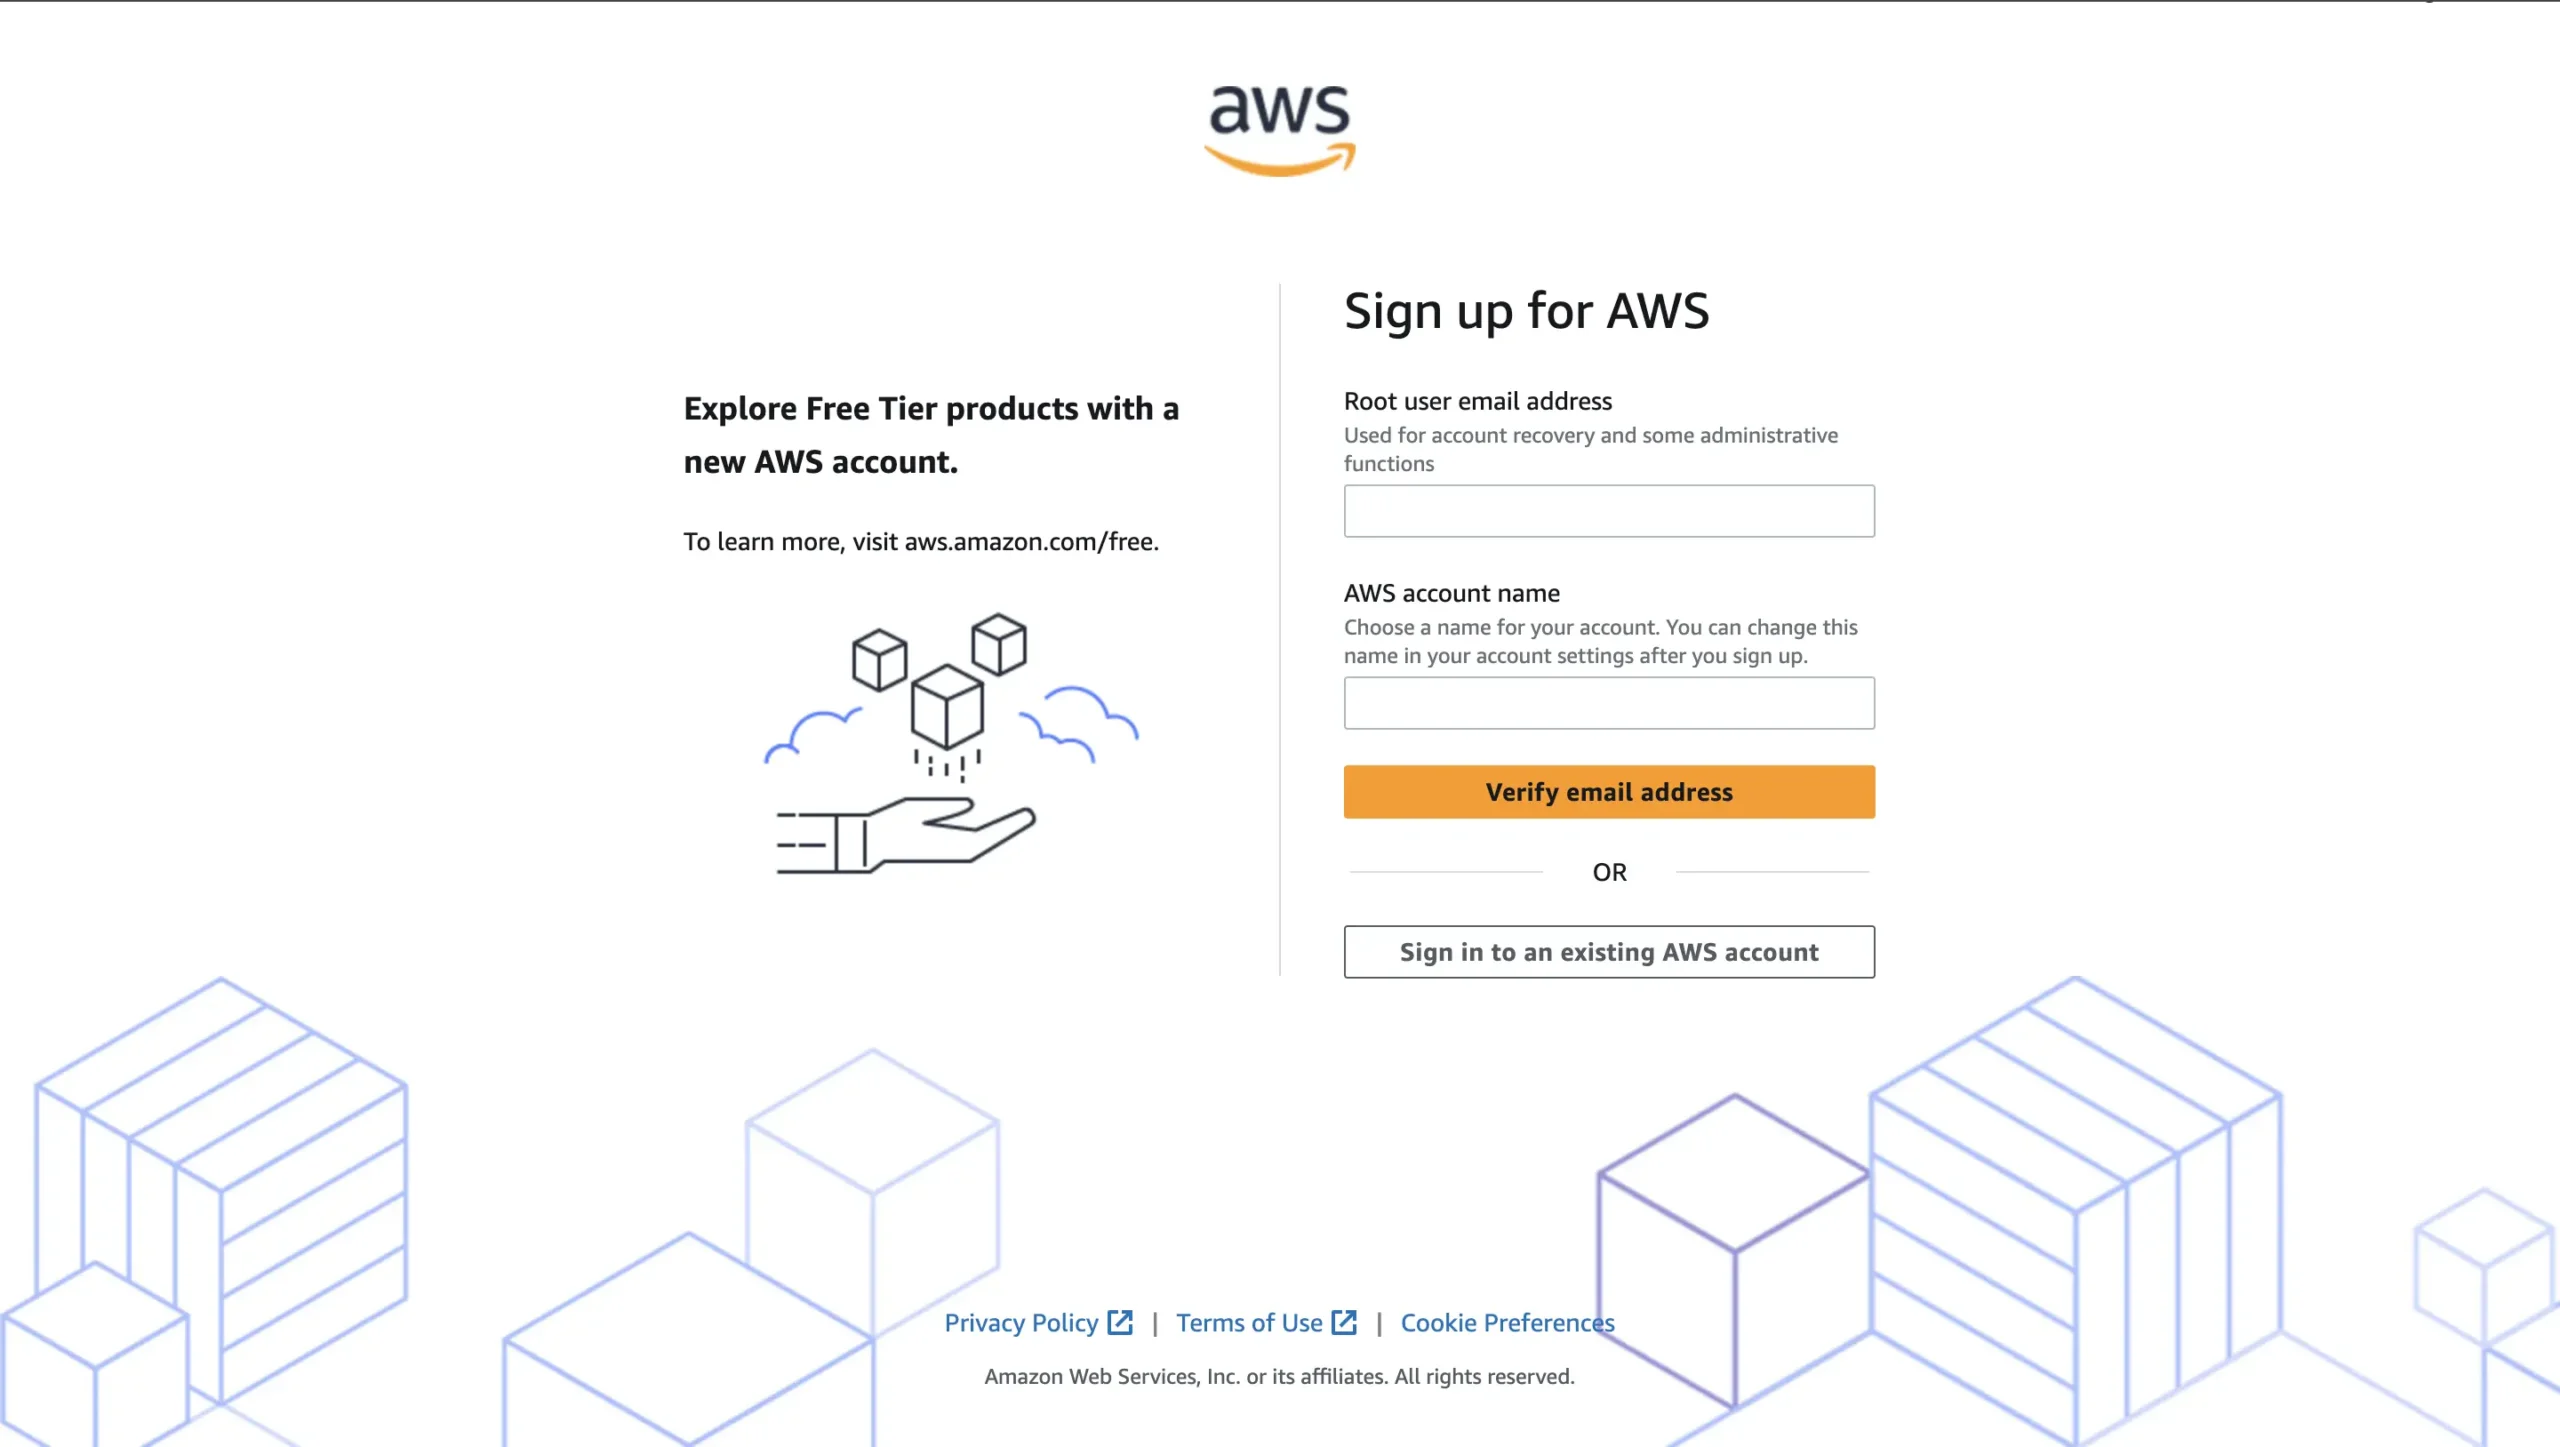
- Fill in your email, set a password, and choose an account name.
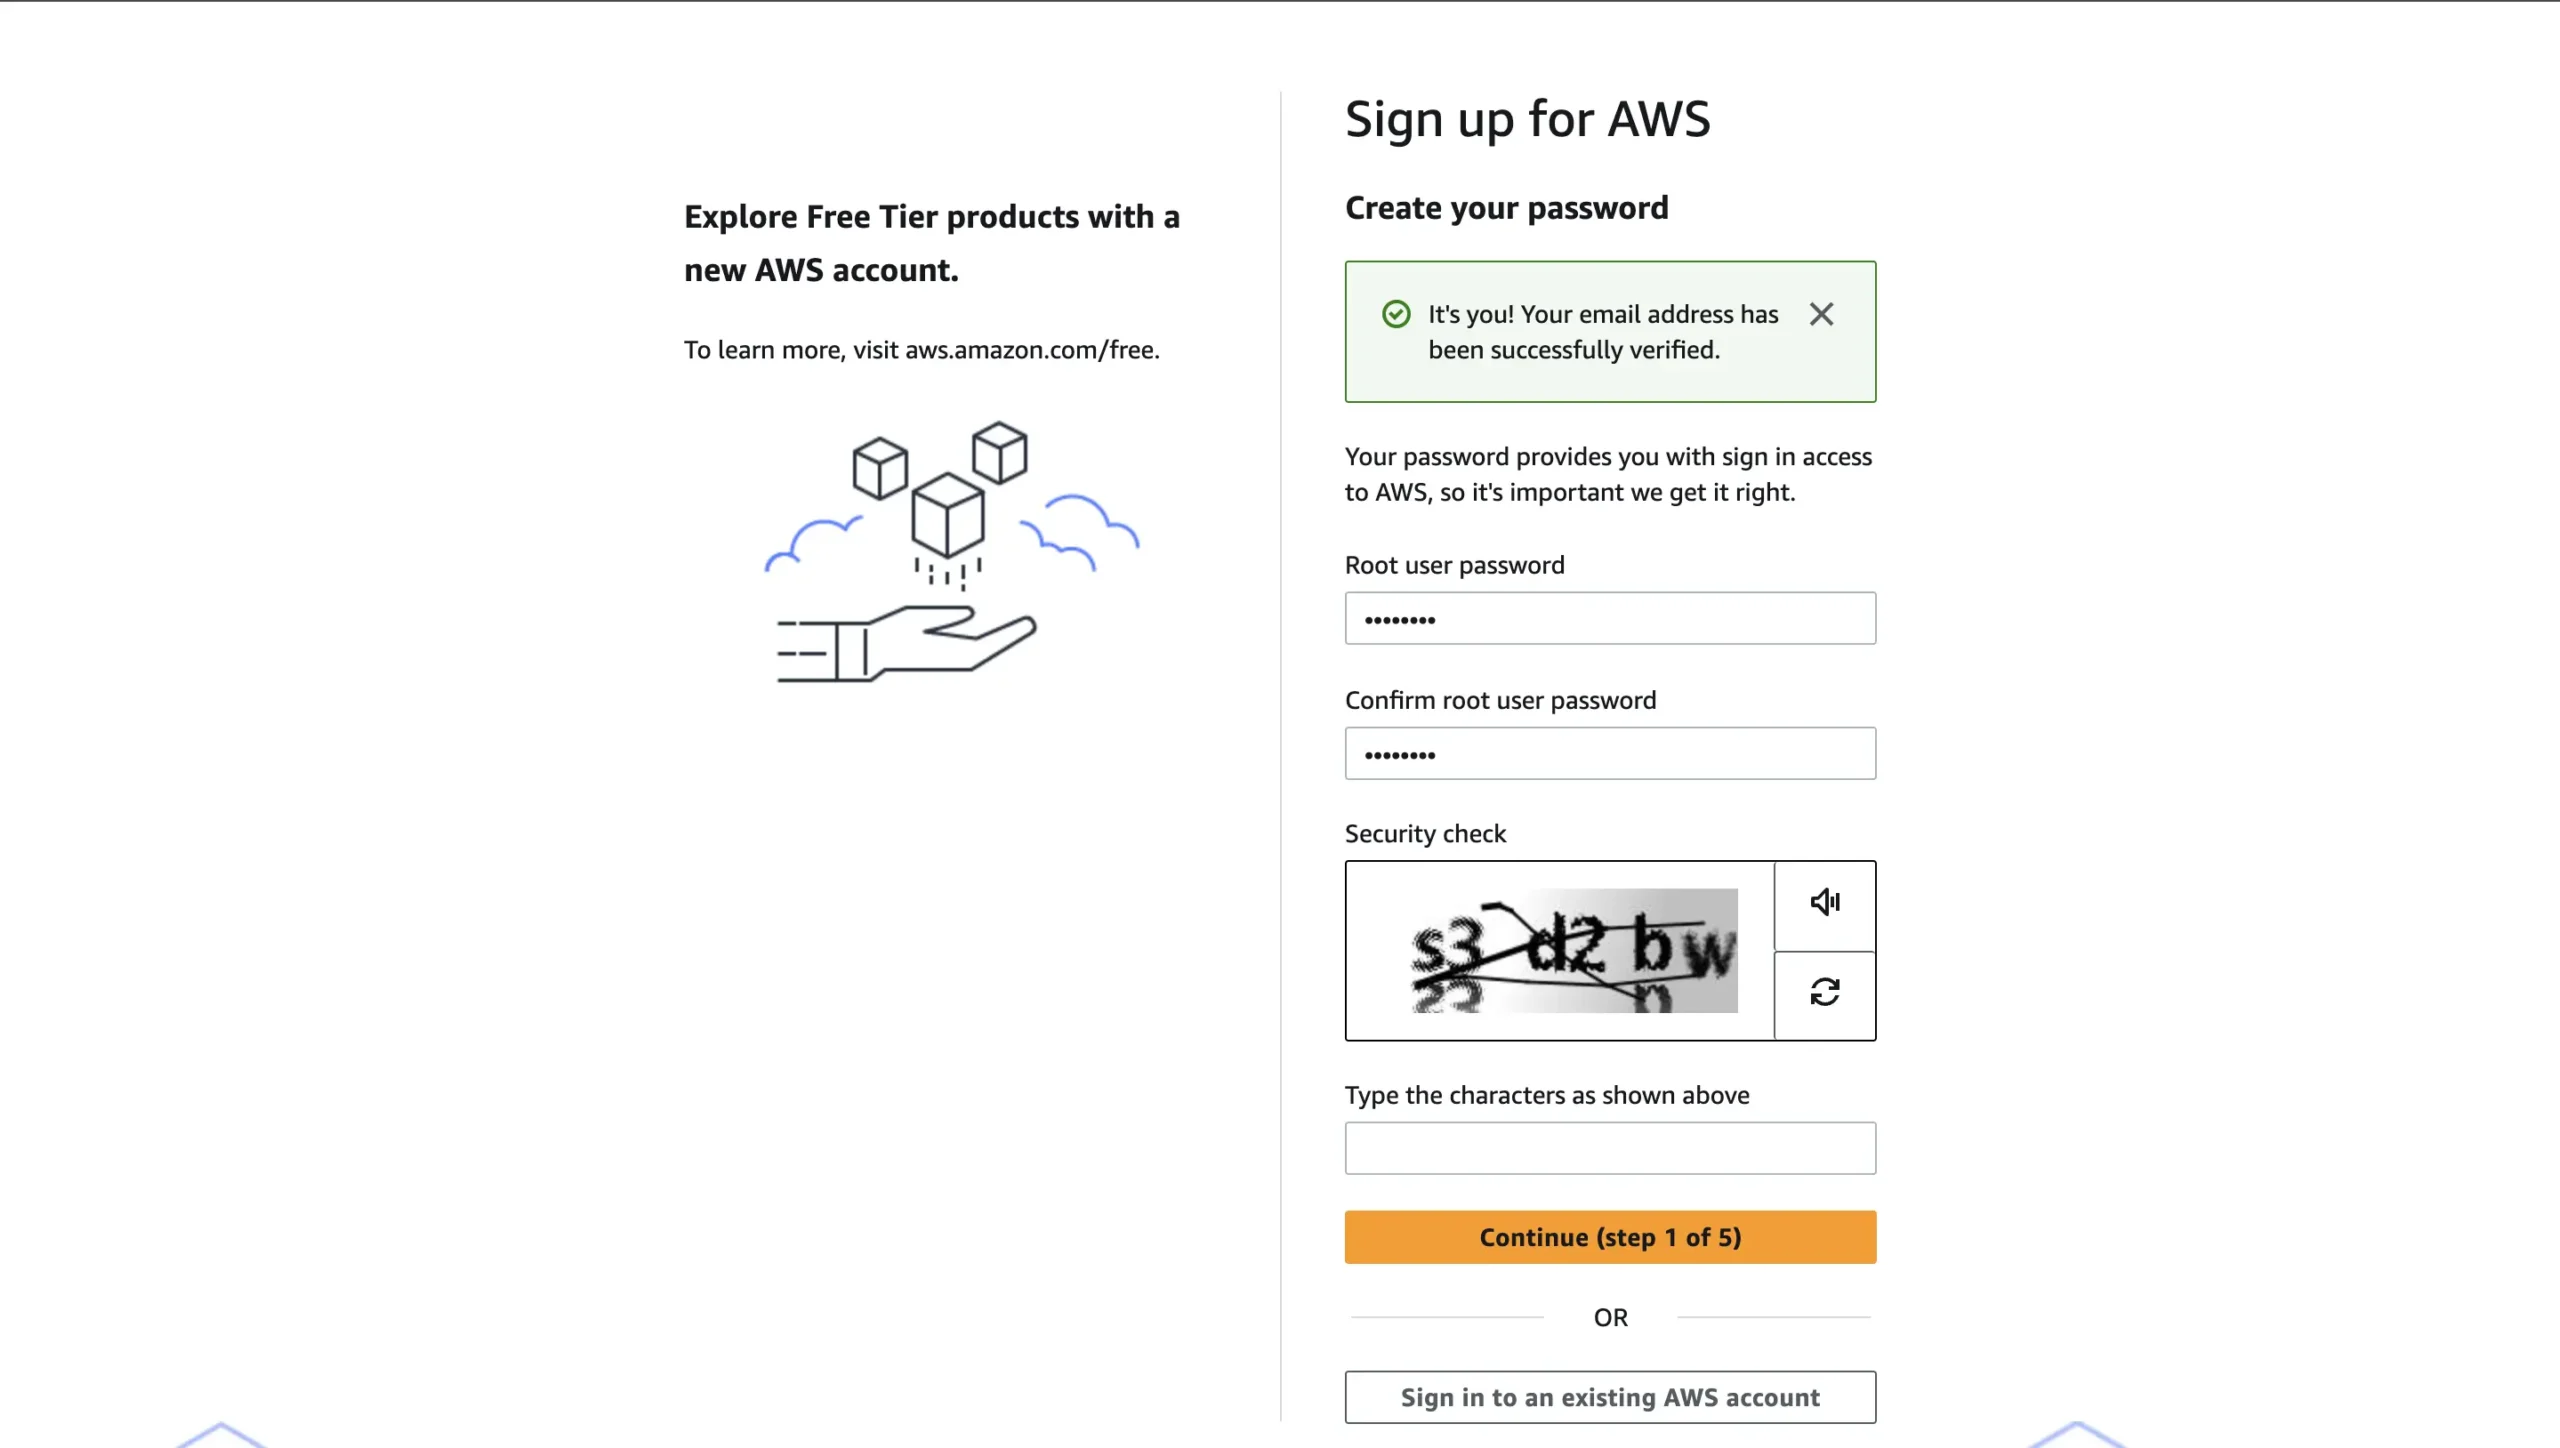
- You’ll need to provide contact information and verify your identity with a mobile phone.
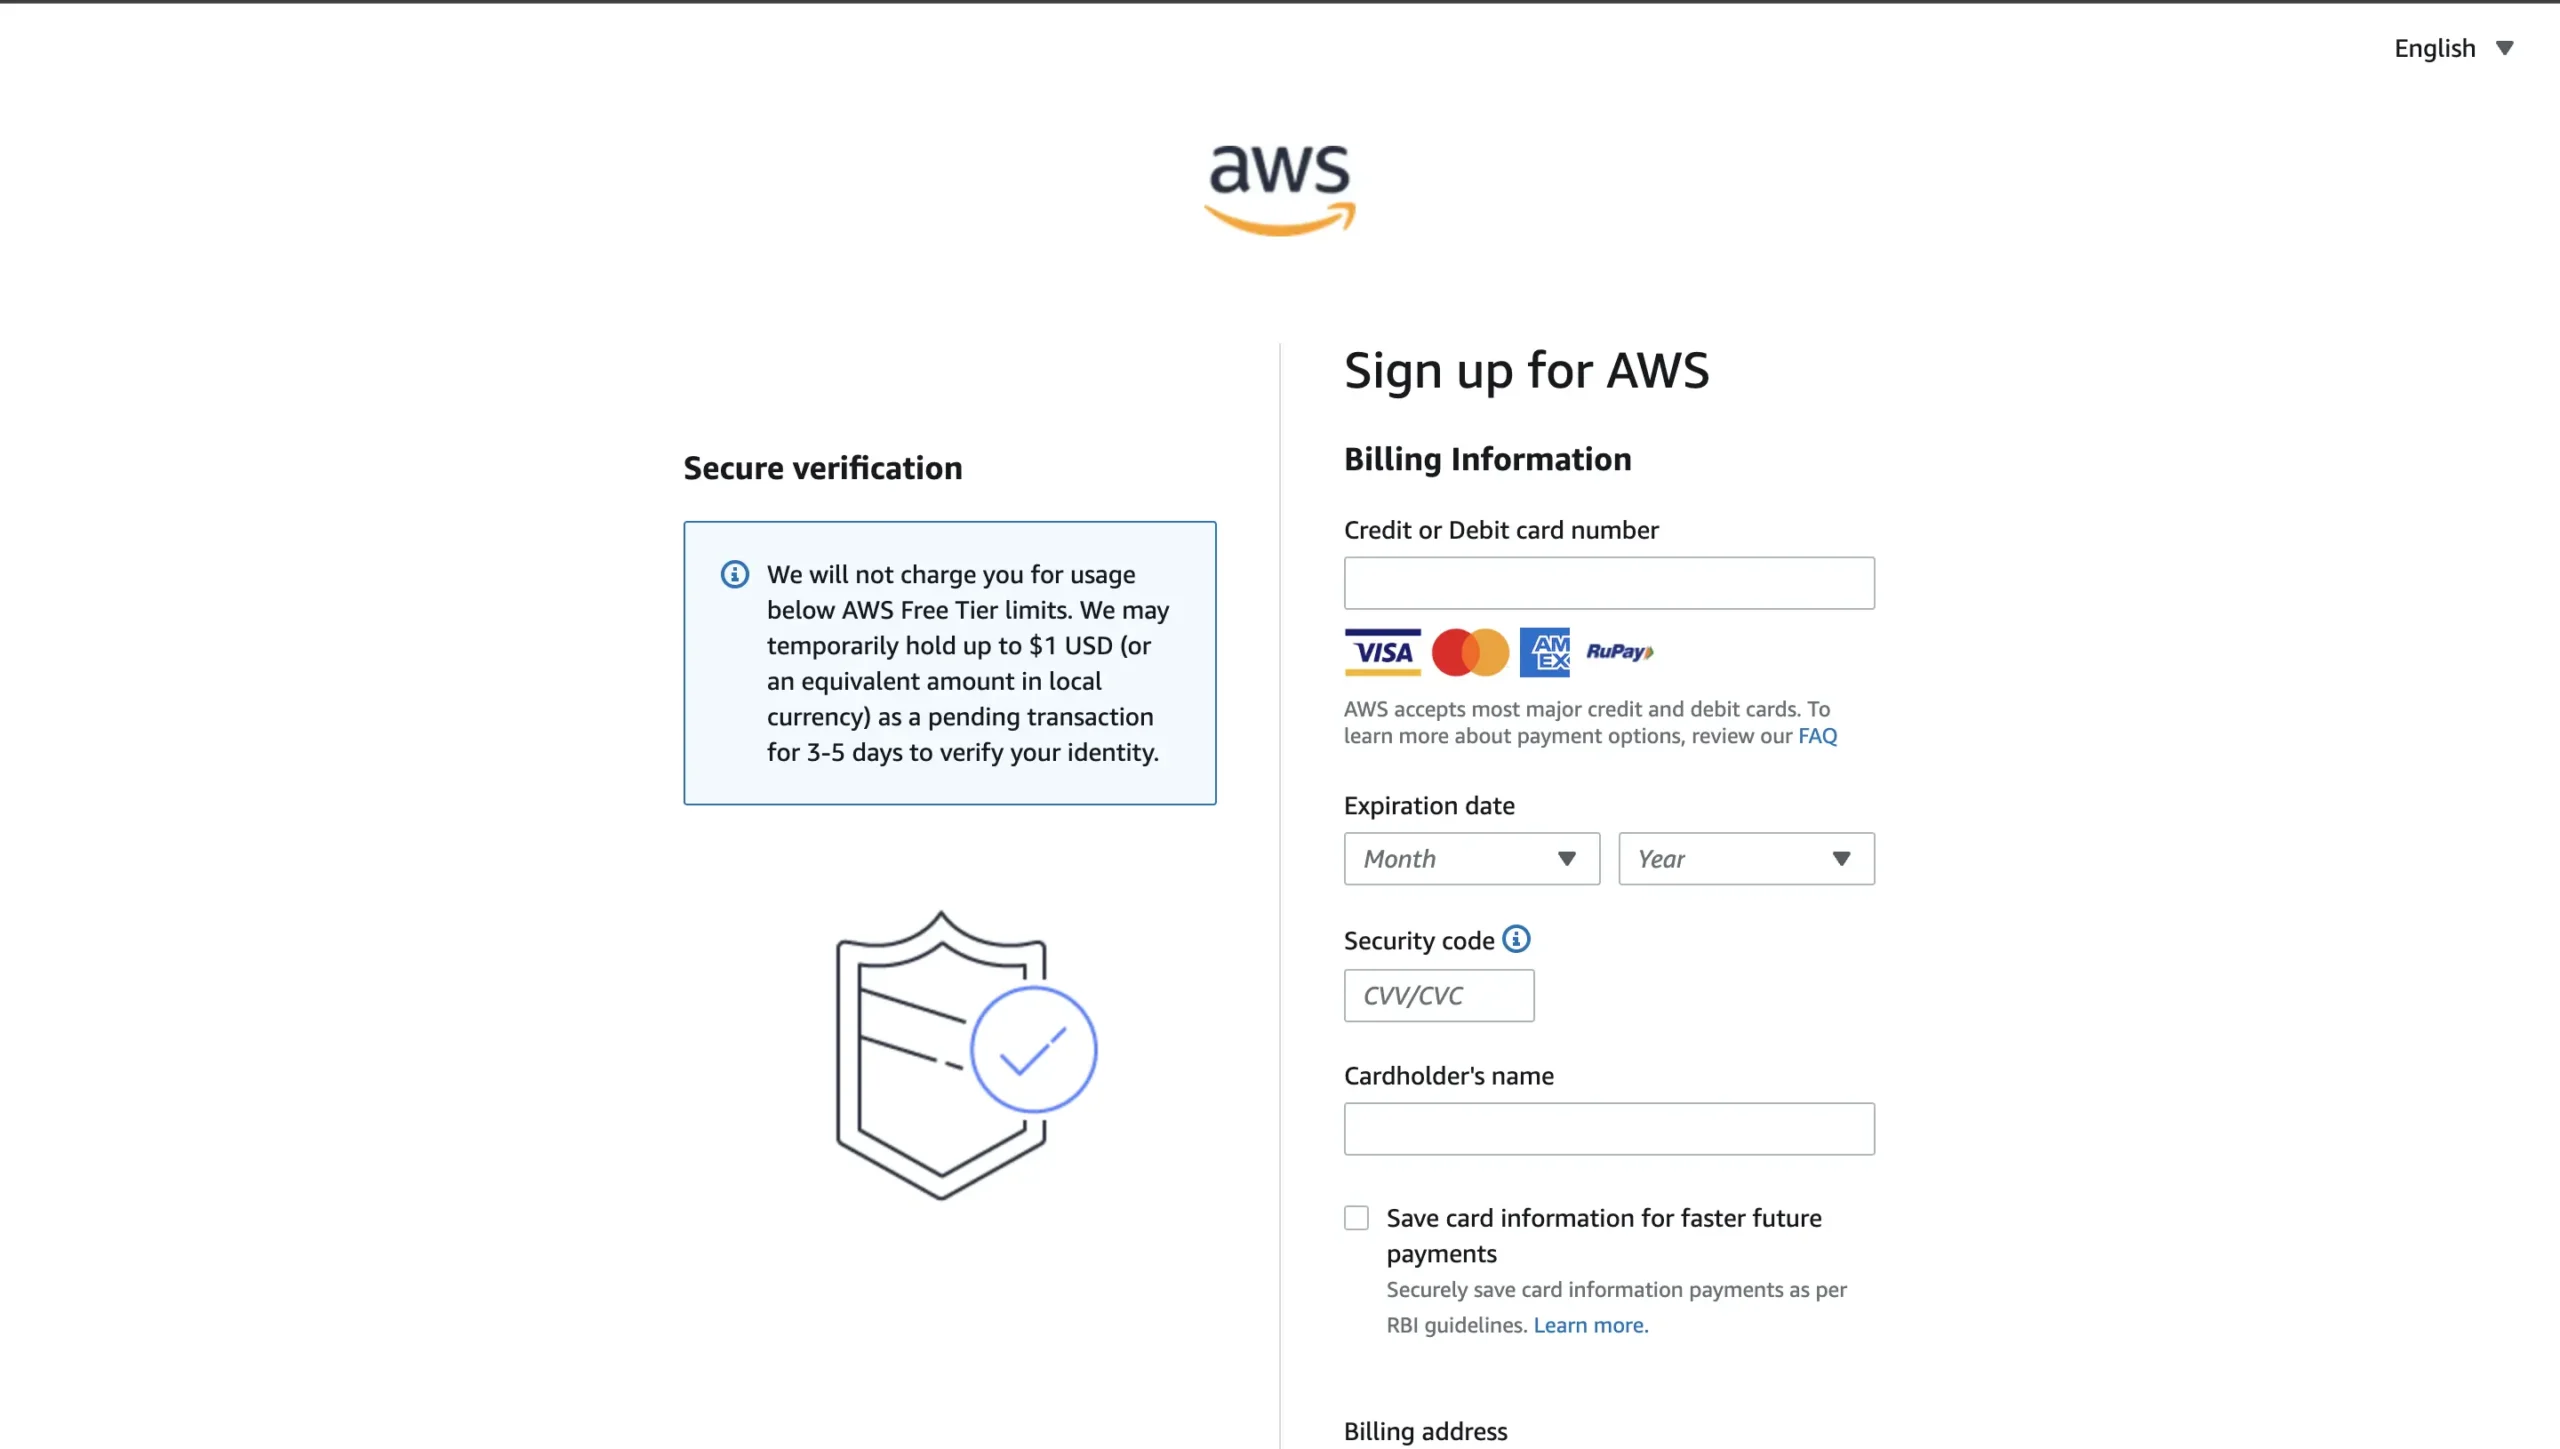
- After entering your credit card details for identity verification purposes (your card won’t be charged if you stay within the Free Tier limits), choose the “Basic” support plan, which is free.
Step 2: Generate an AWS Access Key
Once registered, you need an AWS Access Key and Secret for secure interaction with AWS services:
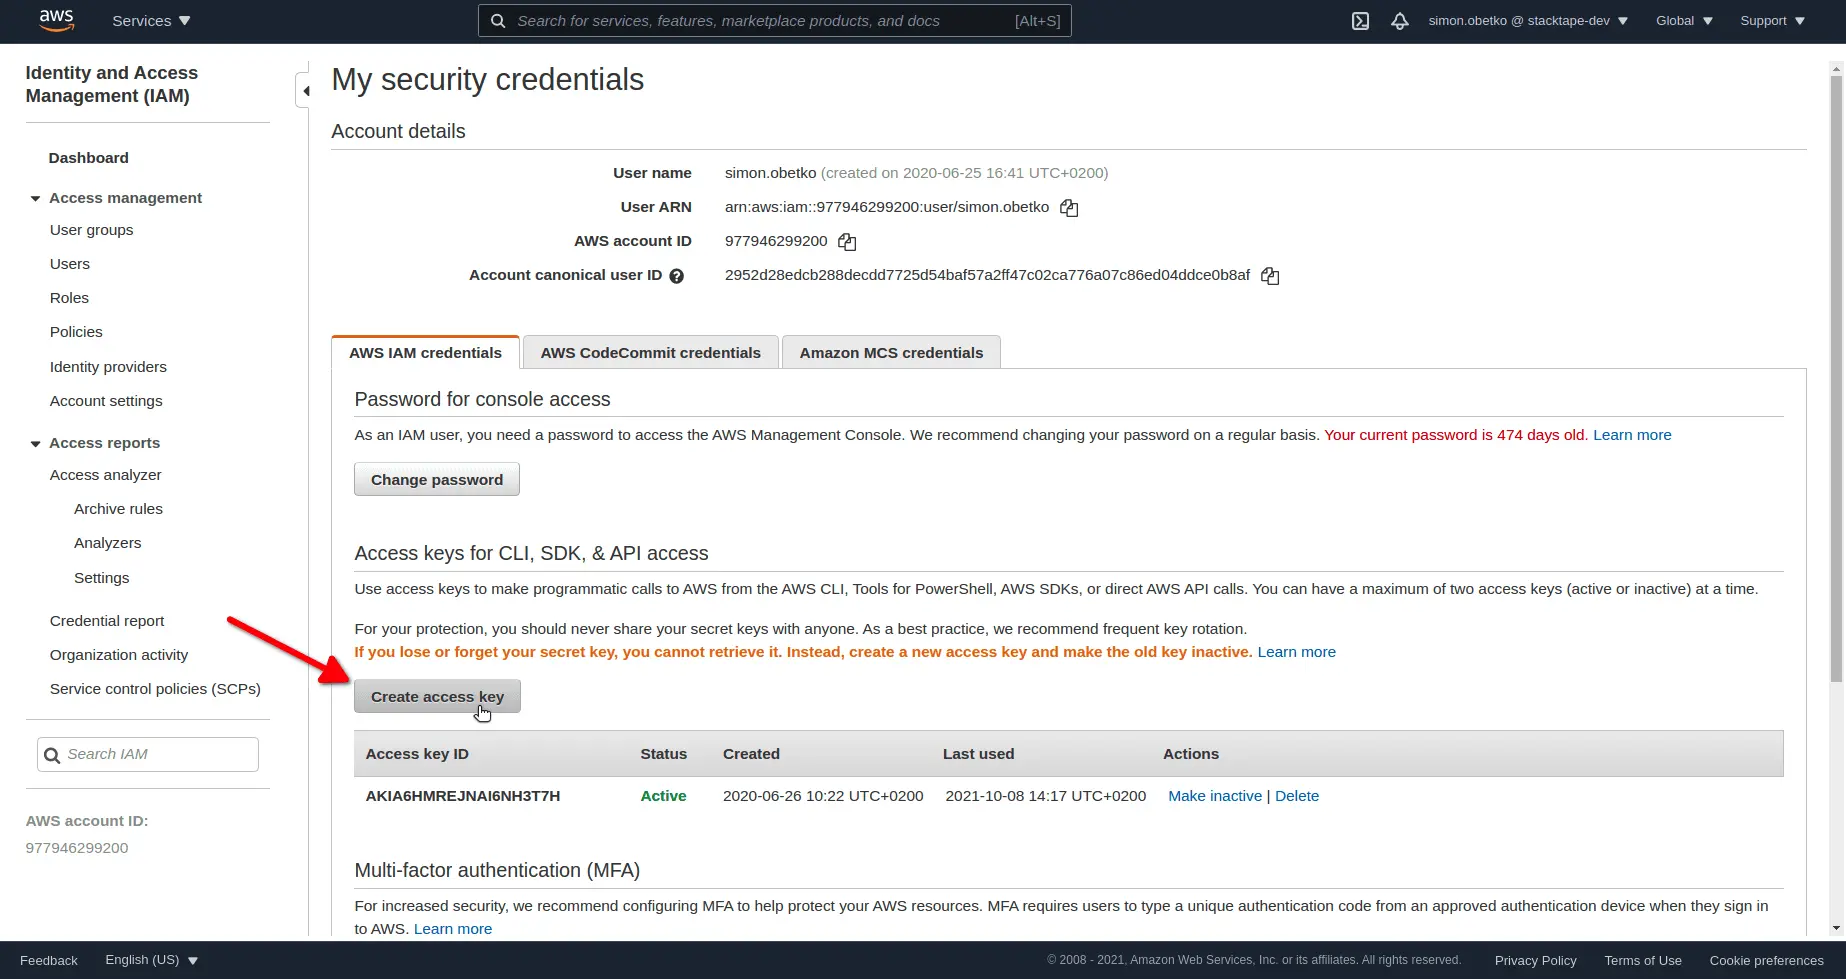
- Log into the AWS Management Console.
- Navigate to your account details section.
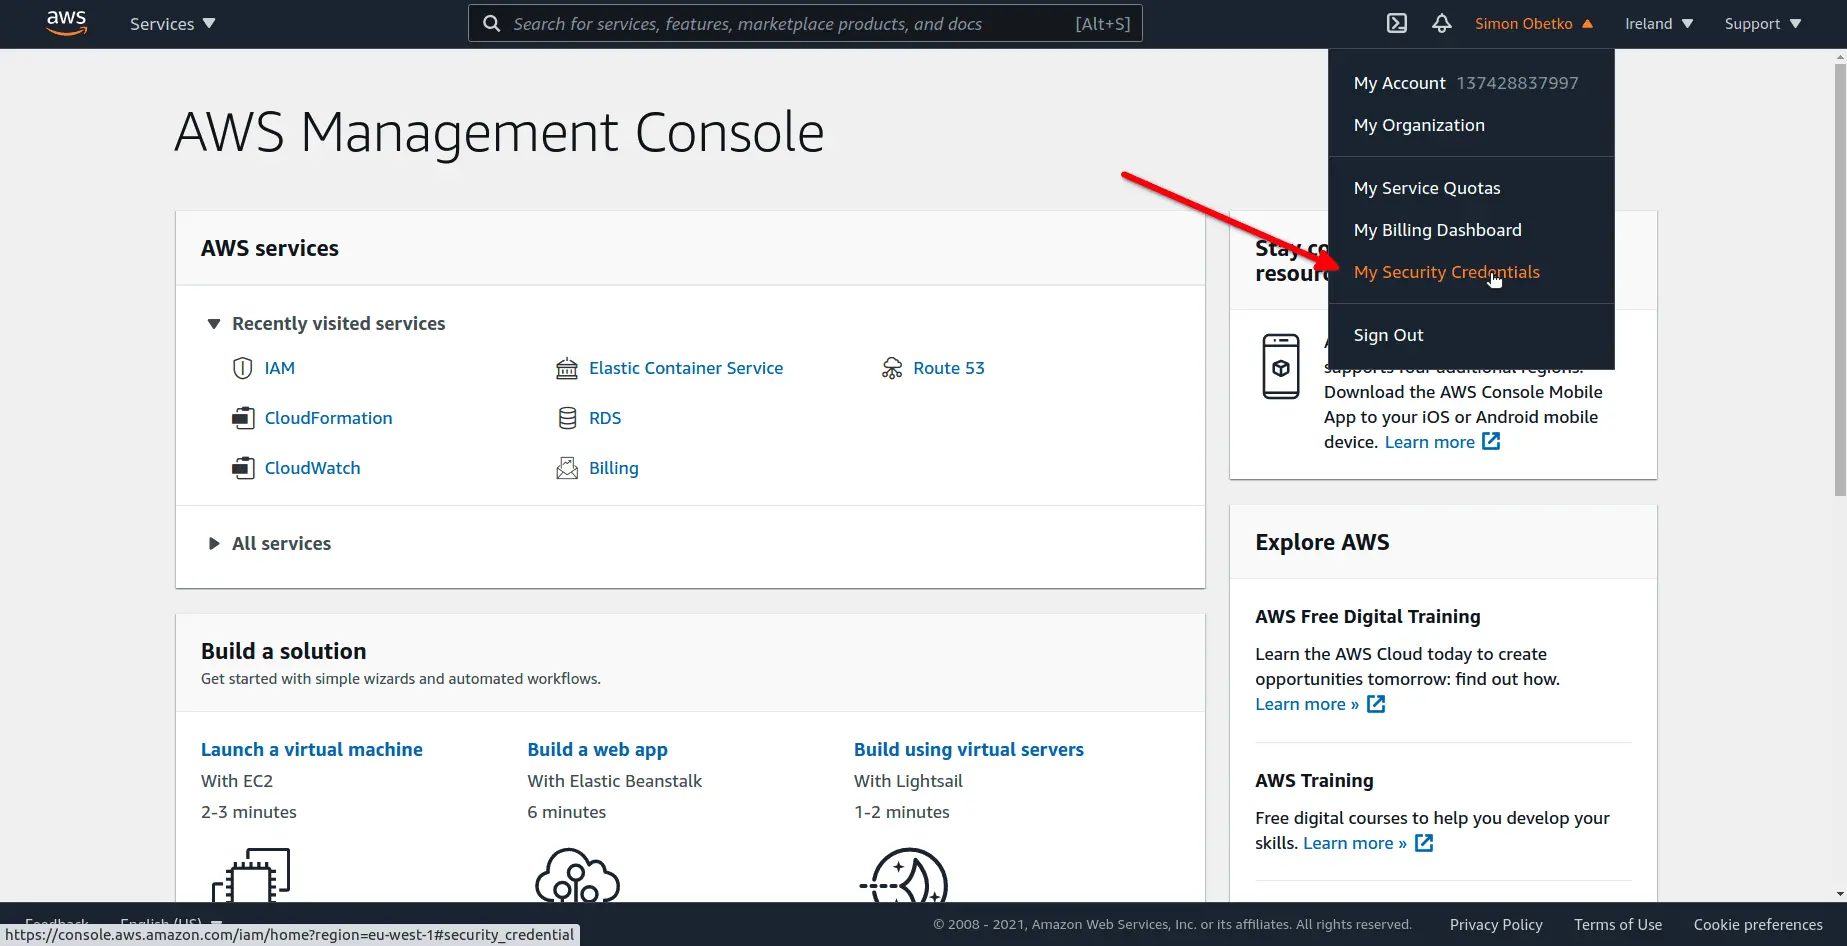
- Select “Security Credentials” and create a new access key. Download and save this key securely, as you will need it to operate AWS services.
Step 3: Deploy WordPress Using Bitnami
Bitnami offers a simplified way to deploy WordPress on AWS:
- Log into the AWS Marketplace.
- Search for “Bitnami WordPress Stack” and select it from the results.
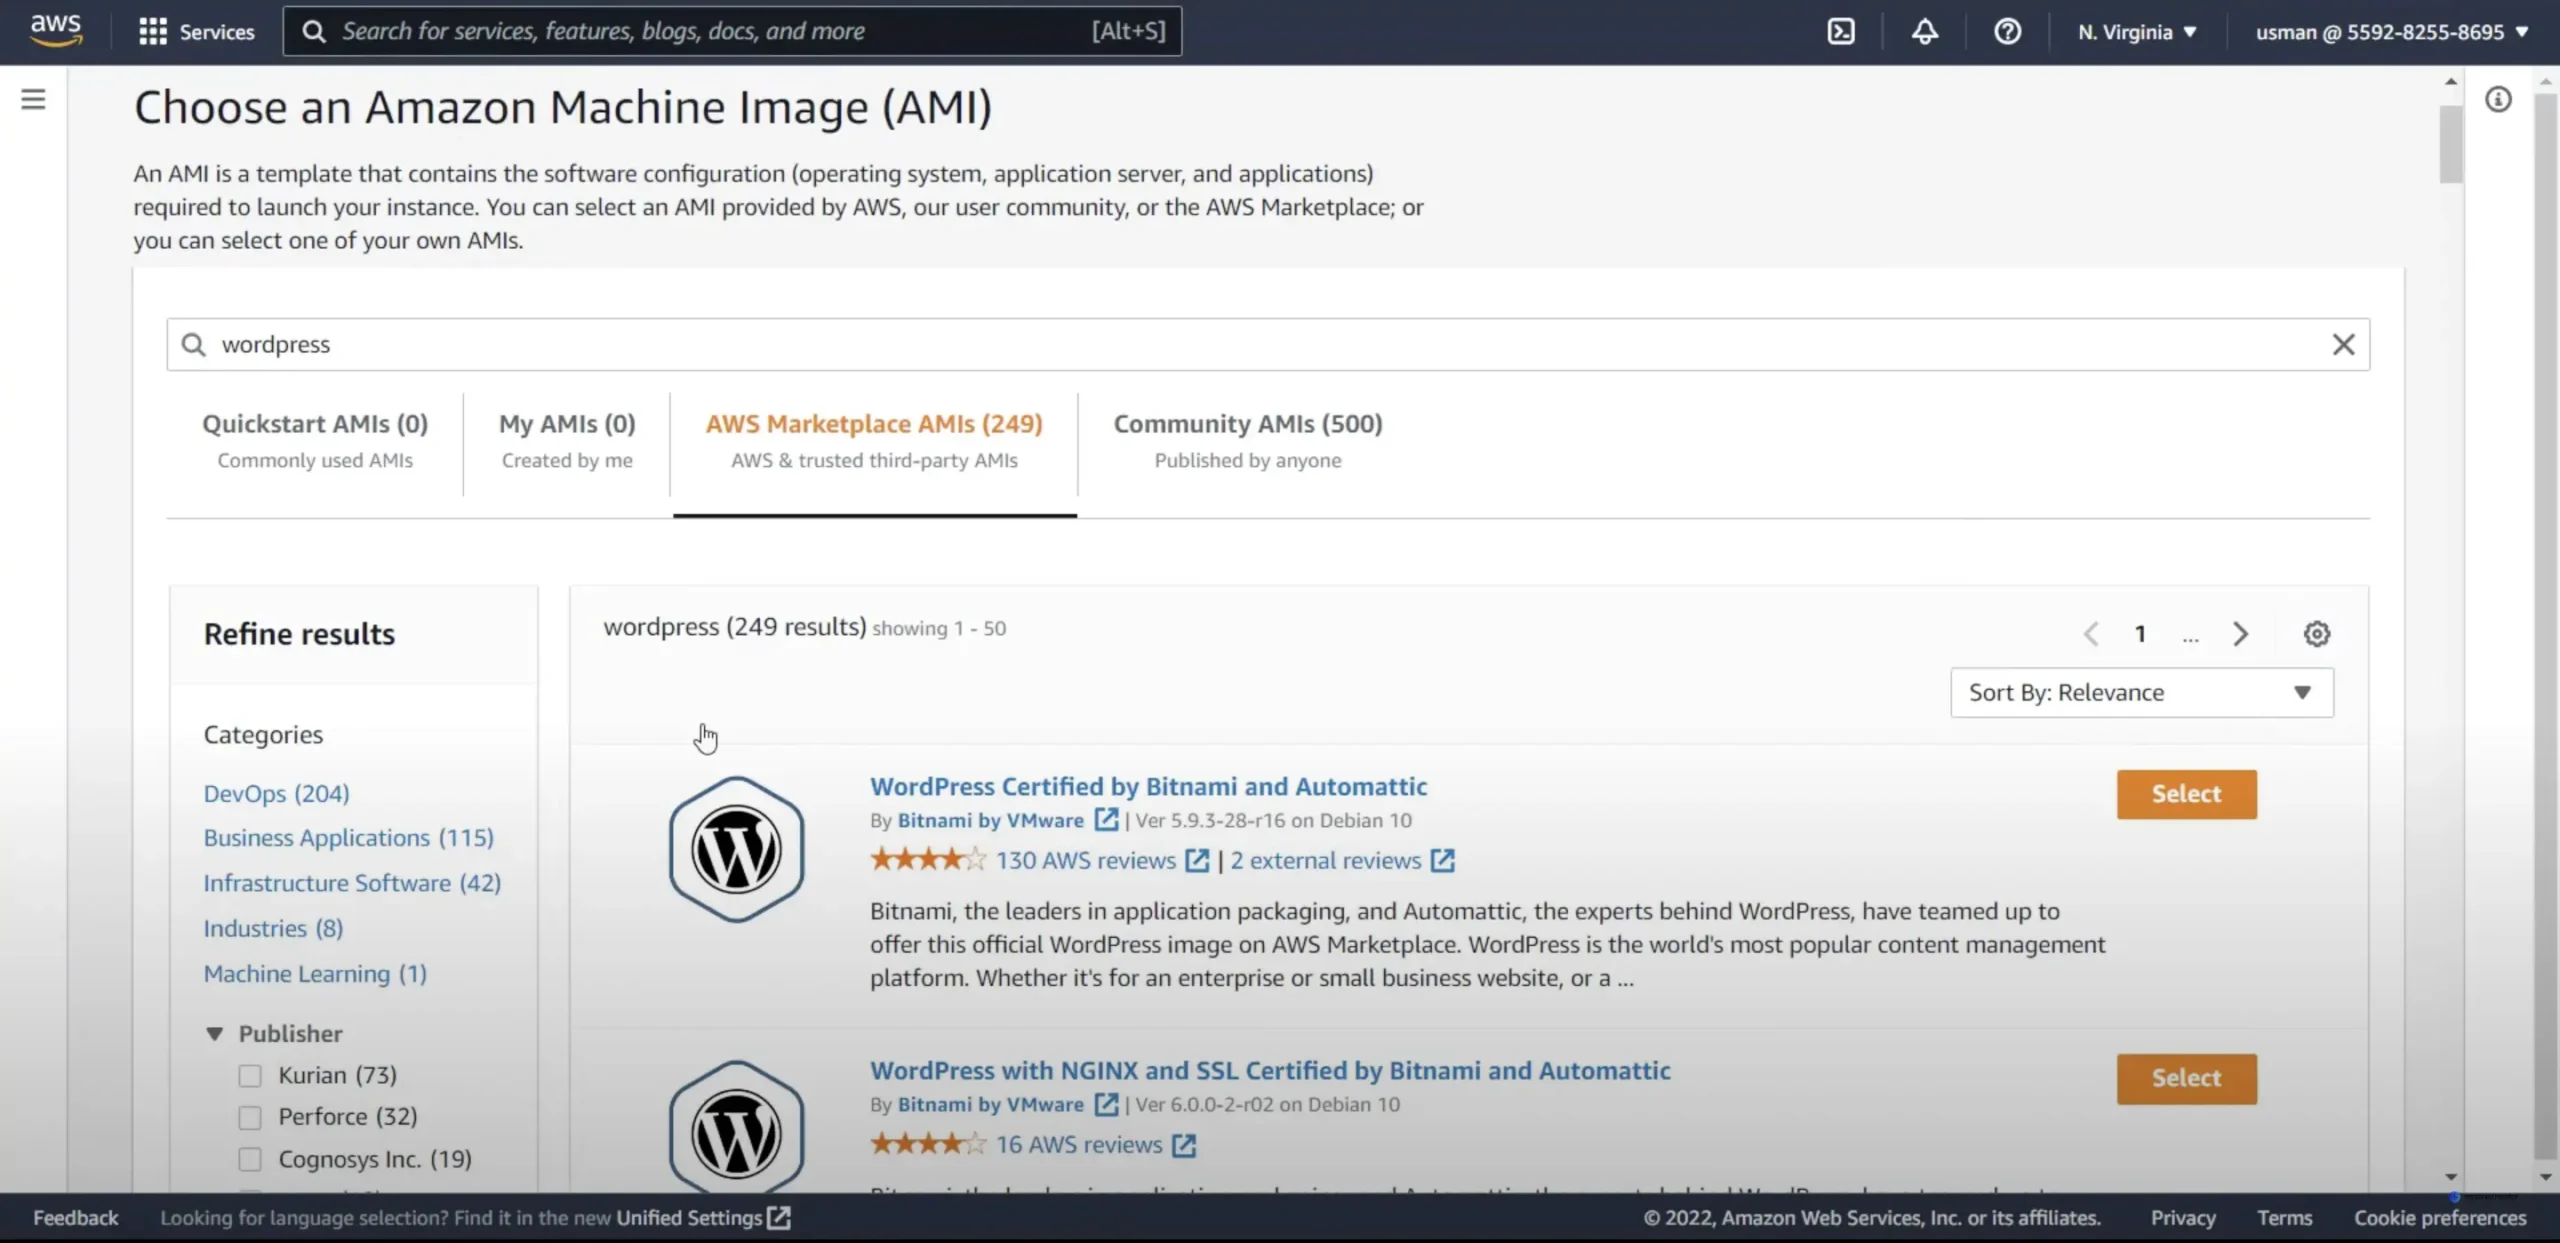
- Click “Continue” to proceed with the 1-Click Launch options. Here, you can choose your instance type (e.g., micro for lower traffic sites), and verify the Key Pair you generated earlier.
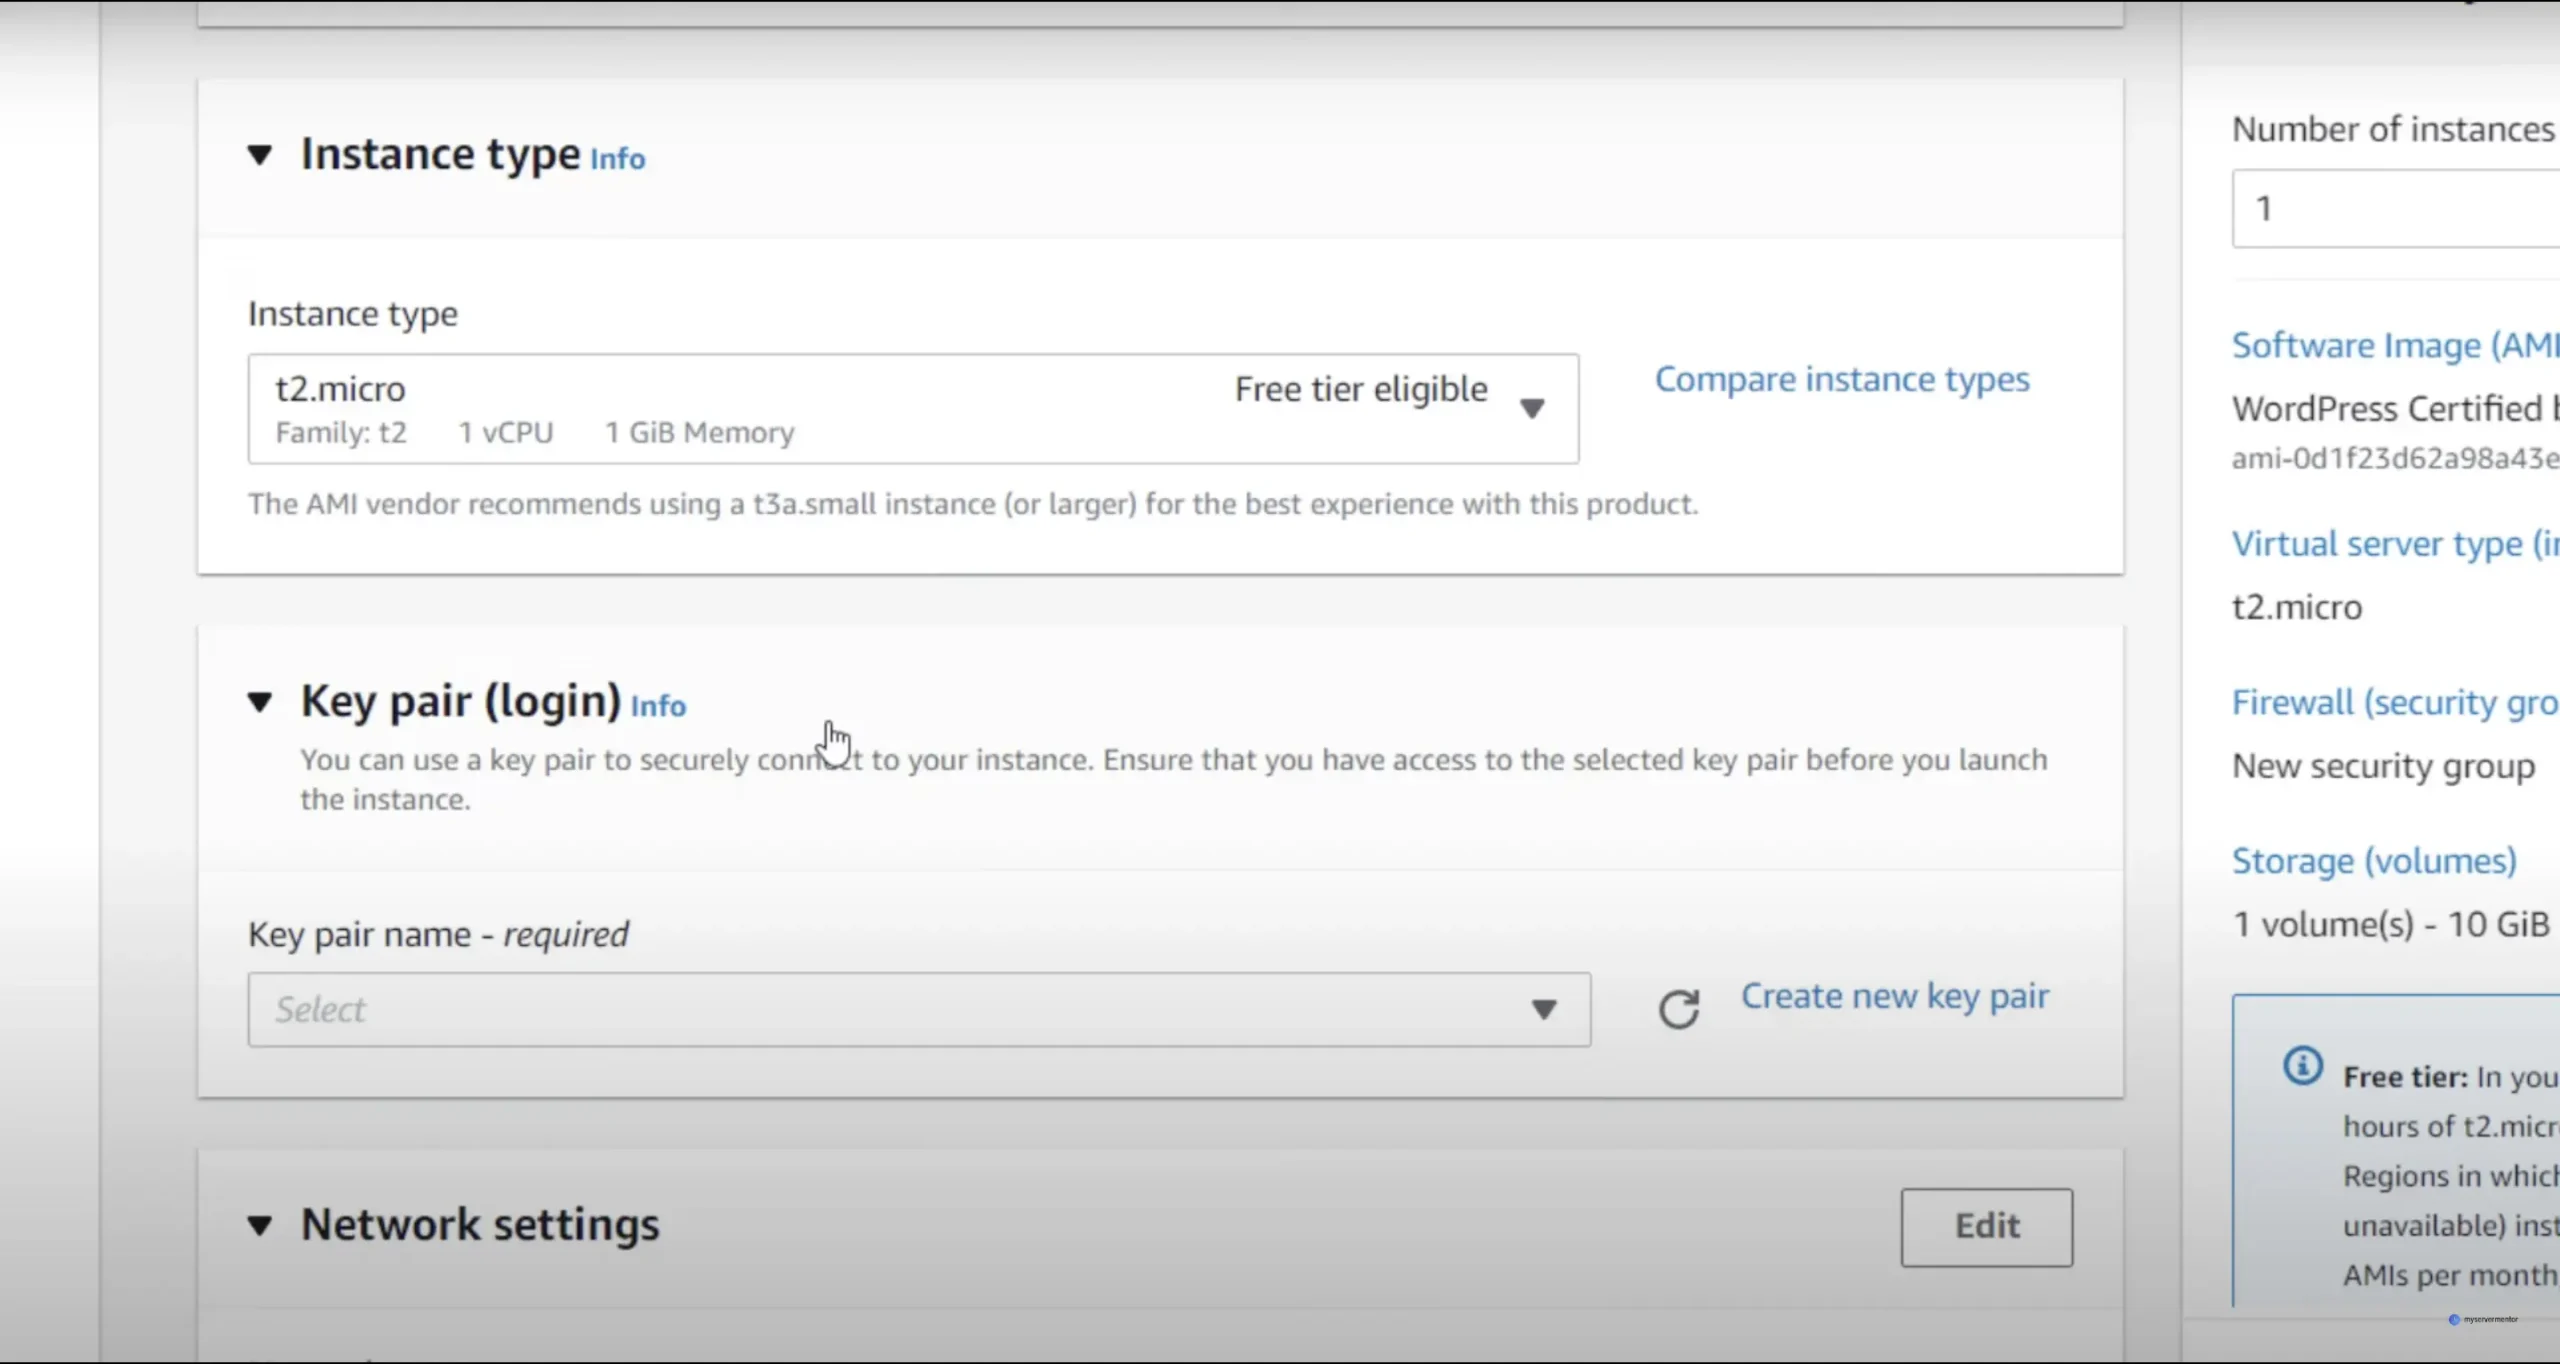
- Click “Launch with 1-Click.” AWS will now initialize your WordPress installation.

Step 4: Obtain WordPress Credentials
Once your instance is running, you’ll need the administrator credentials to access your new WordPress site:
- Go back to the AWS Console.
- Navigate to the EC2 dashboard and select your instance.
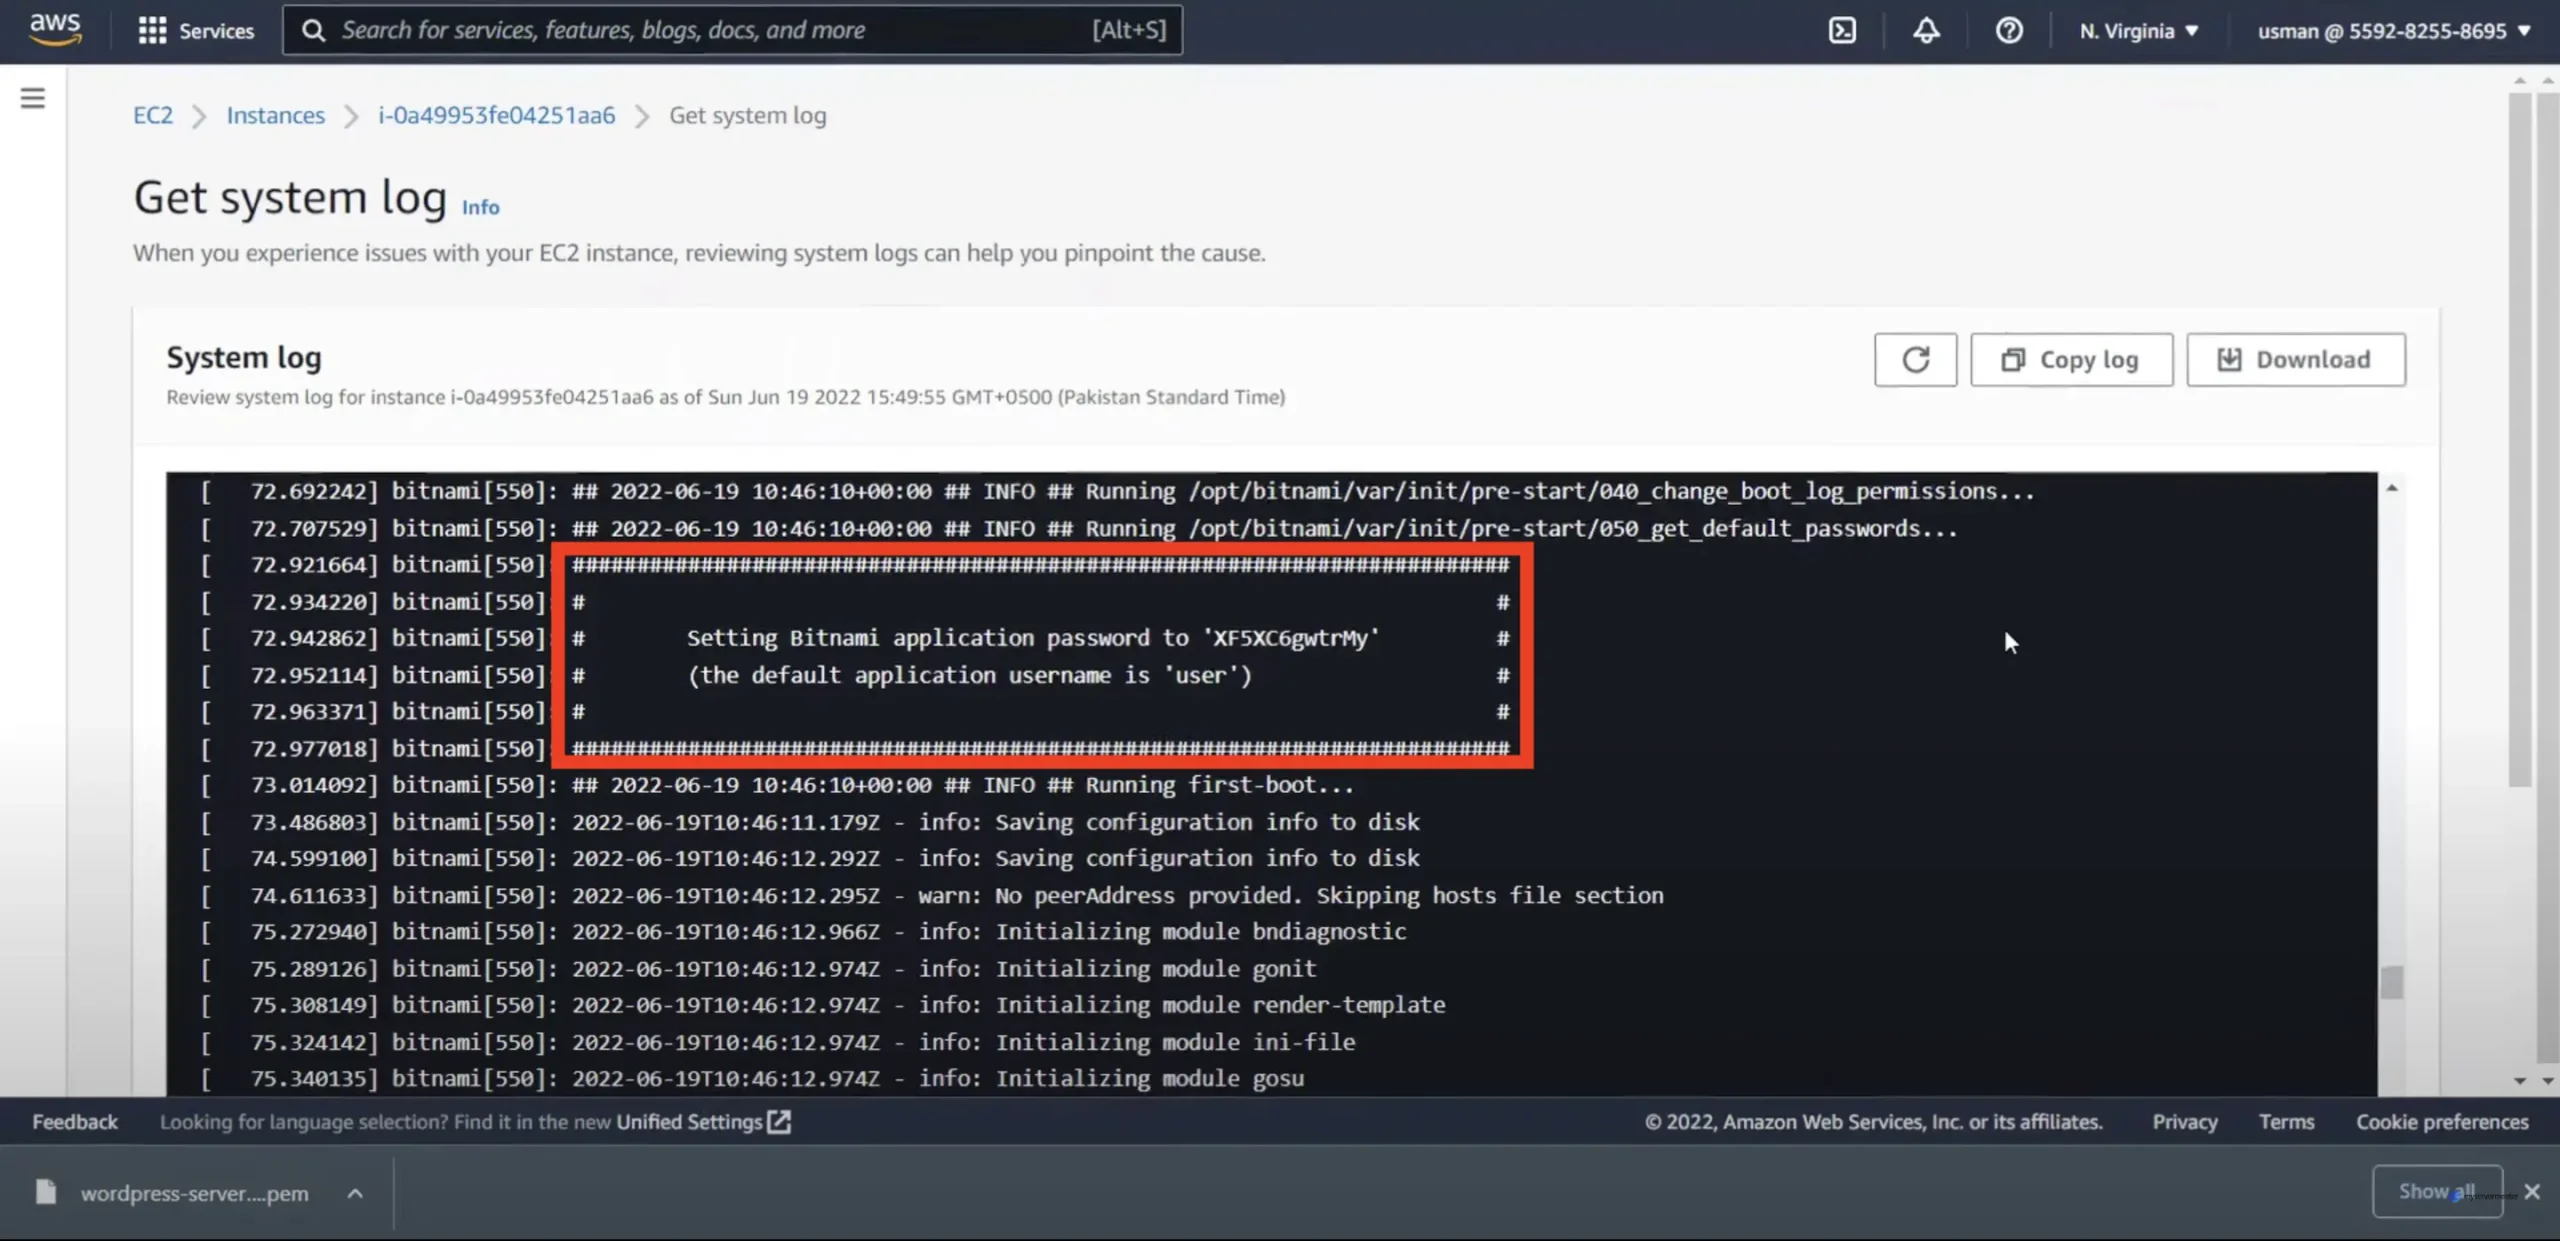
- Under “Actions,” select “Get System Log.”
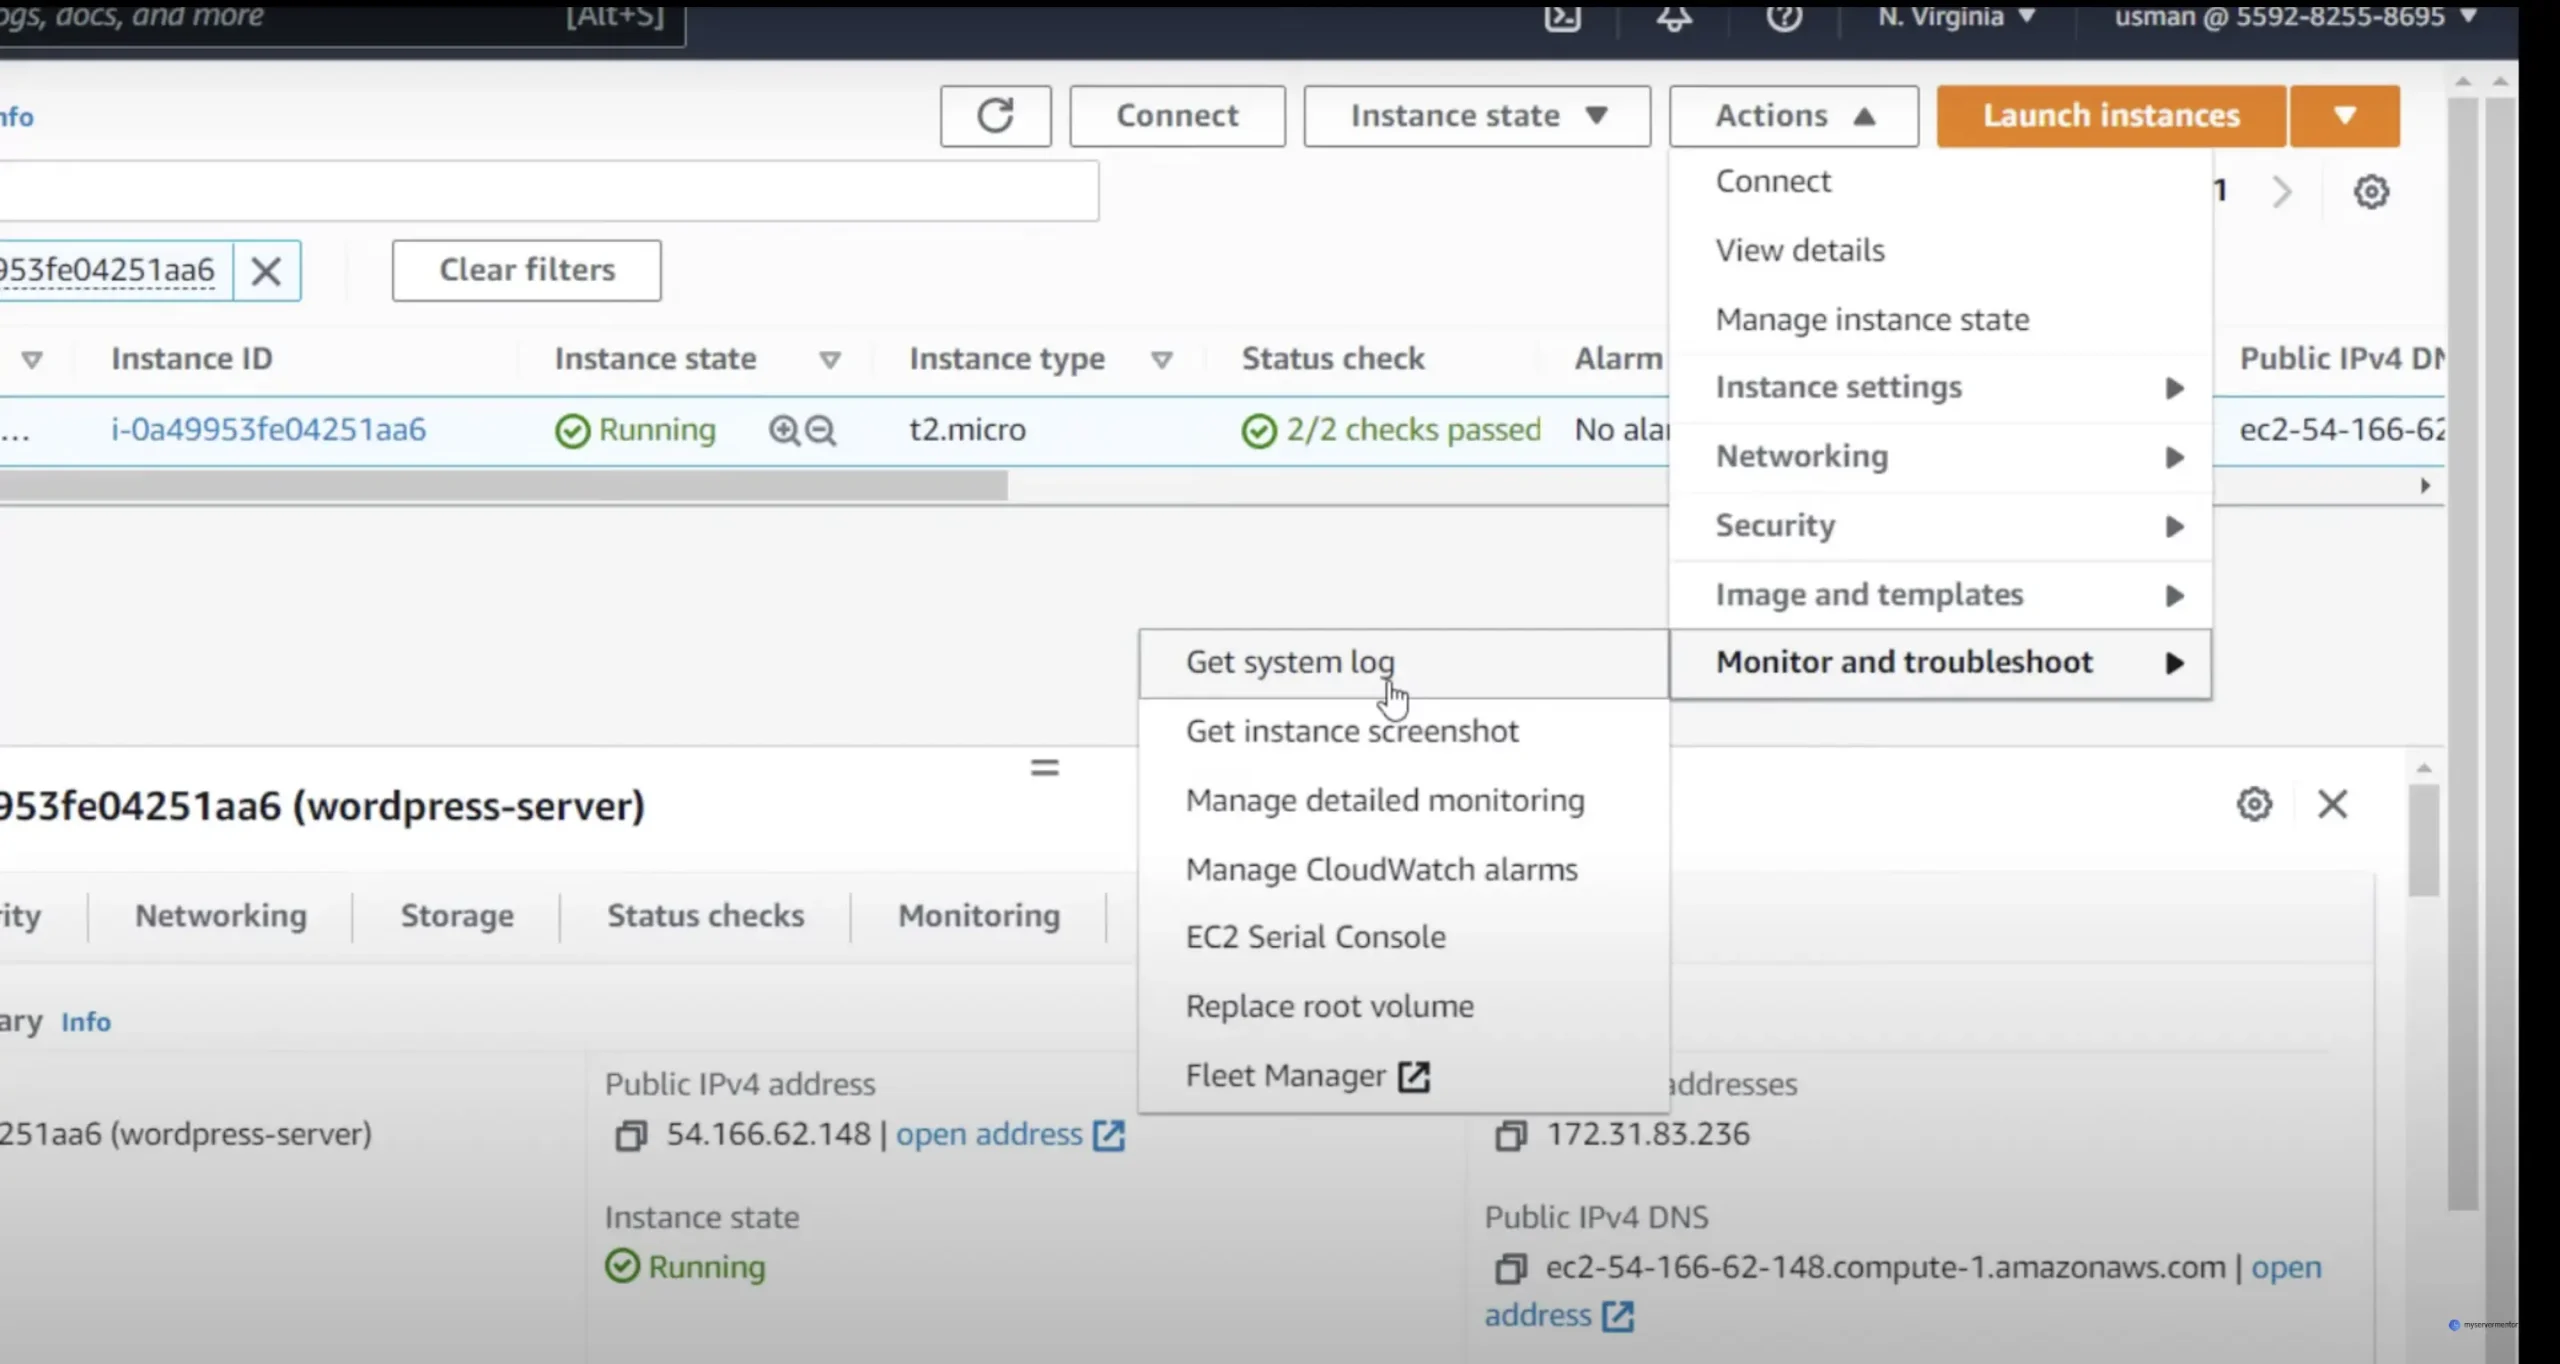
- Scroll through the log to find your WordPress ‘Admin’ username and password. Save these credentials securely.
Step 5: Log Into Your WordPress Site
With your credentials:
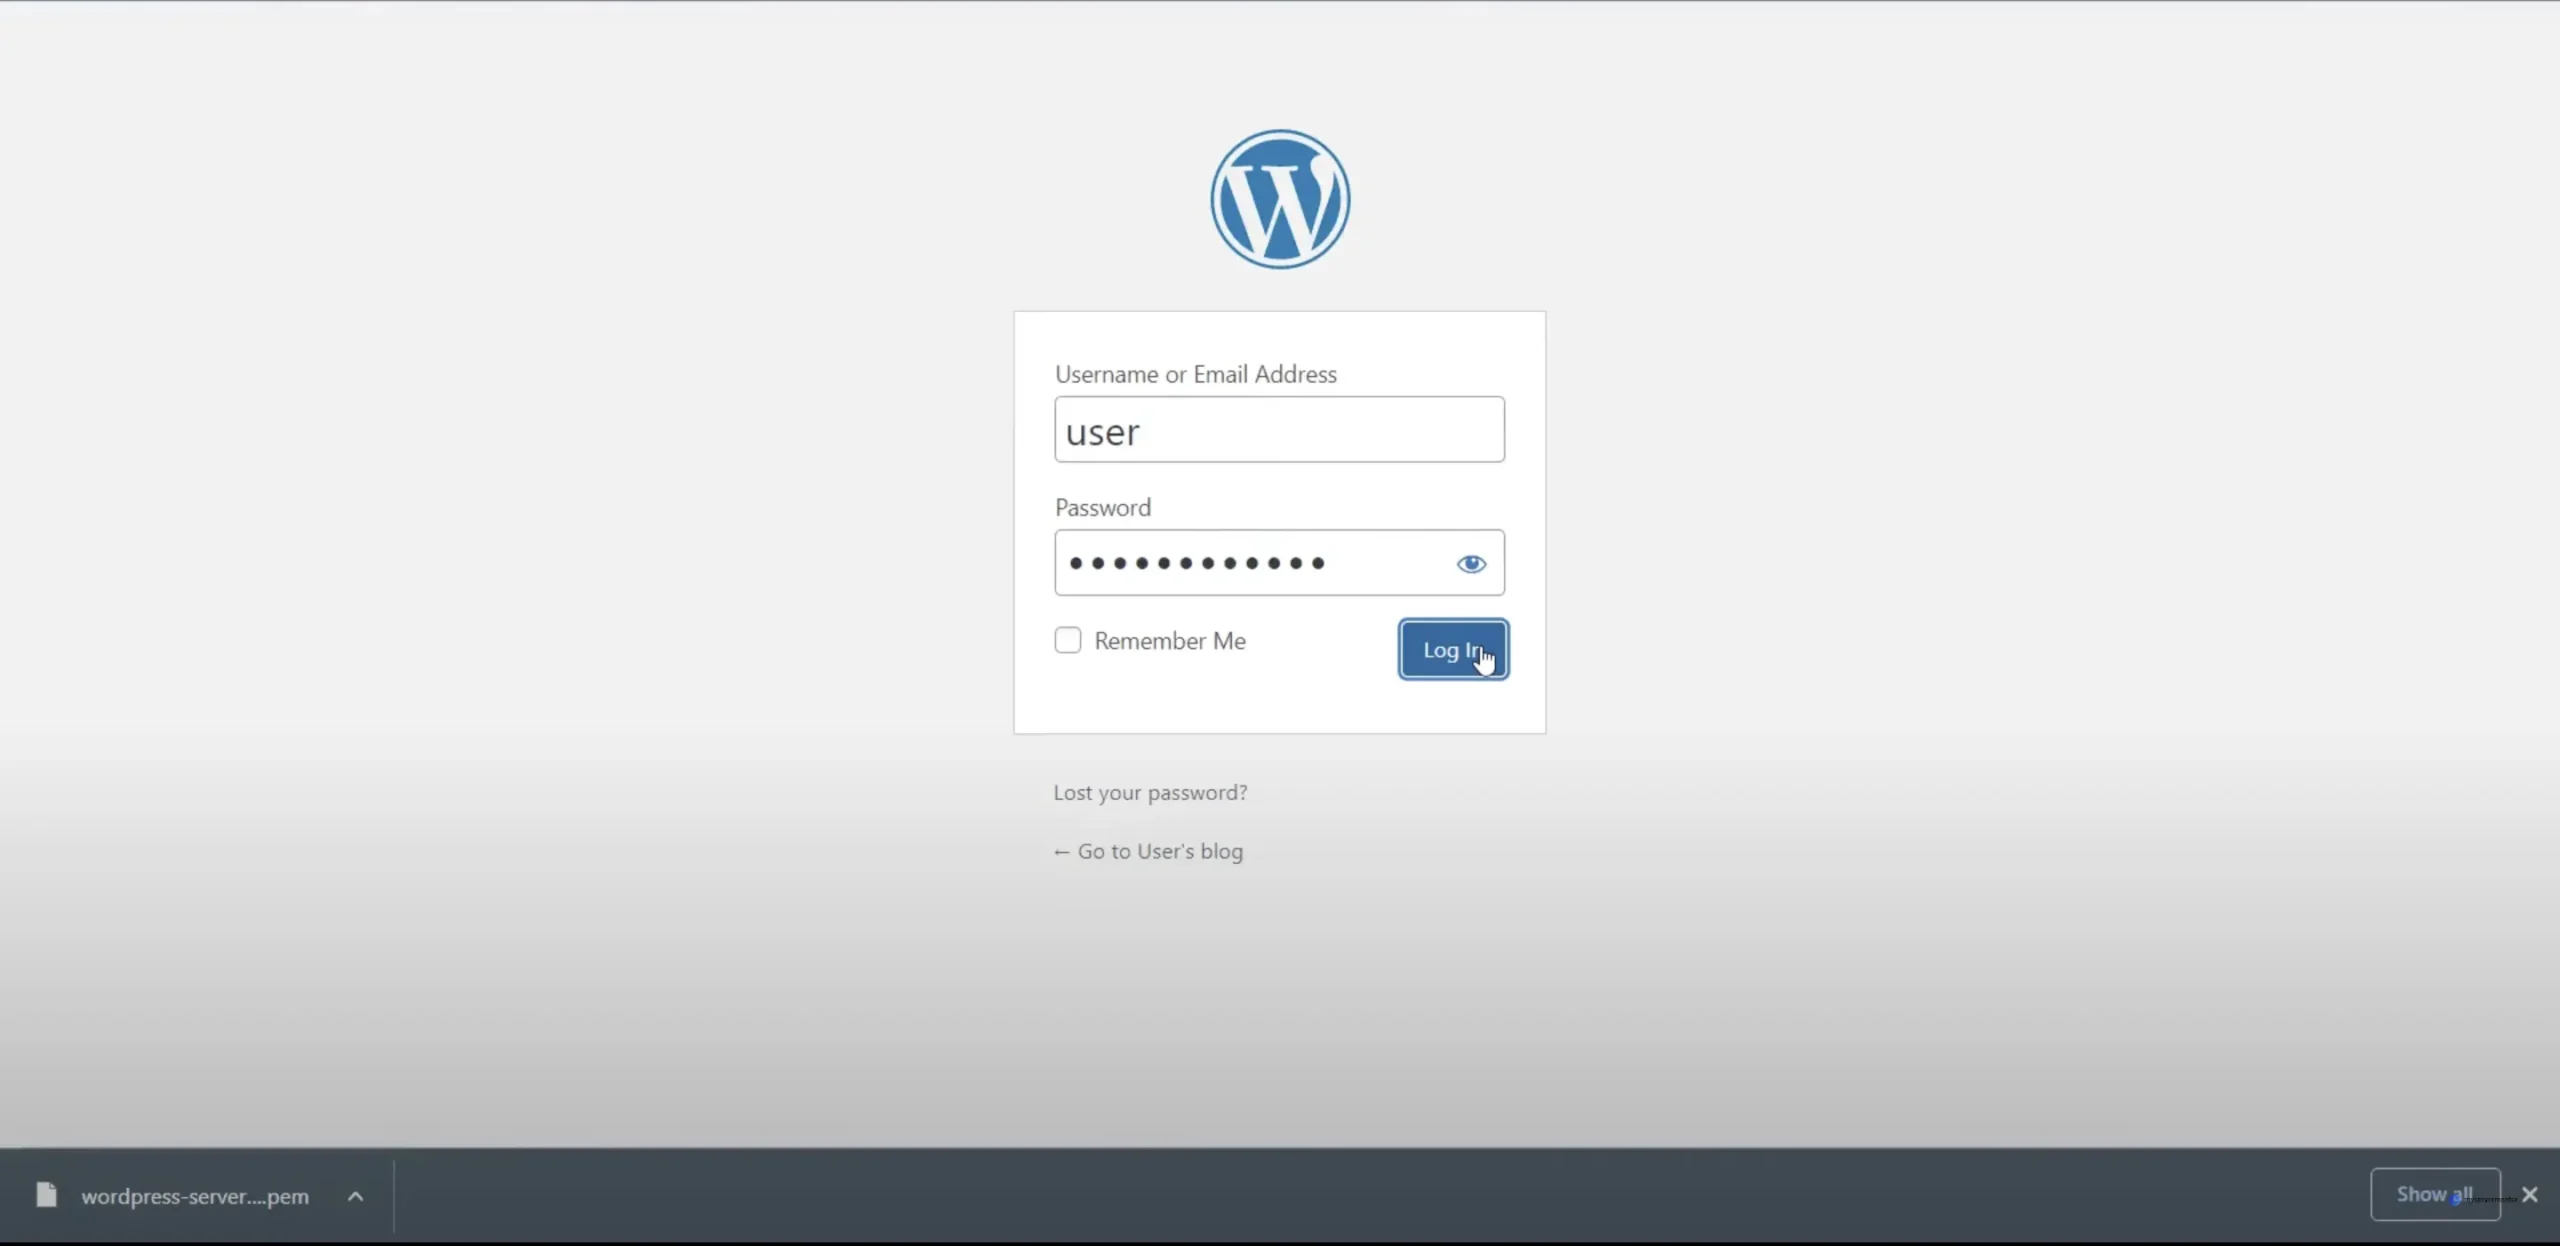
- Open a web browser and enter your instance’s public IP address followed by /wp-admin (e.g., http://<your-public-ip>/wp-admin).
- Log in using the credentials obtained from the system log.
Step 6: Regular Maintenance and Backup
Regularly check for WordPress updates to ensure your site remains secure and functional:
- Navigate to “Dashboard → Updates.”
- If updates are available, click “Update Now” to install the latest version
Conclusion
Setting up a WordPress site on Amazon Web Services (AWS) is easy and stress-free. You get to take advantage of AWS’s awesome features, which means your site will stay fast and reliable even as it grows bigger. Plus, with AWS on your side, your WordPress site will have top-notch security and be available to users all the time.
Have fun setting up your WordPress site on AWS and enjoy the perks it brings to your online presence!
Mastering Load Balancing for Optimal WordPress…
Enhance your WordPress site's performance and reliability…
Cross-Site Scripting (XSS): A Comprehensive Guide
Discover the ins and outs of Cross-Site…

Understanding Web Application Firewall (WAF)
Explore Web Application Firewalls (WAFs): how they…
4 Replies to “Deploy a WordPress website on AWS”