What is NGINX? All you need to know
Discover the power of NGINX for WordPress hosting and server management. Learn about its architecture, benefits, use cases, and step-by-step setup guide.
In today’s digital age, website performance, scalability, and security are paramount. NGINX (pronounced “engine-x”) is a robust solution offering unparalleled efficiency and flexibility. This comprehensive guide explores NGINX’s architecture, benefits, and practical applications, focusing on WordPress and server hosting environments. Let’s dive into the intricacies of NGINX and learn how mastering this tool can elevate your web infrastructure.
What Is NGINX?
NGINX is an open-source software that functions as a web server, reverse proxy, load balancer, and HTTP cache. Created by Igor Sysoev to address the C10K problem—handling ten thousand concurrent connections—NGINX has become a versatile tool integral to modern web infrastructure. Its event-driven architecture ensures high performance and resource efficiency, making it a popular choice among developers and system administrators.
A Brief History:
NGINX was developed in 2002 and released publicly in 2004. Its goal was to outperform traditional web servers like Apache, especially under high loads. Since then, NGINX has steadily gained popularity and now powers a significant portion of the internet, including high-traffic sites like Netflix, Pinterest, and WordPress.com.
Key Features:
- Event-Driven Architecture: Handles multiple connections within a single process using an event loop.
- Reverse Proxying: Forwards client requests to backend servers and returns the responses.
- Load Balancing: Distributes traffic across multiple servers.
- SSL/TLS Termination: Manages SSL/TLS encryption, offloading the work from backend servers.
- Caching: Caches static and dynamic content to improve performance.
How Does NGINX Work?
NGINX operates on an asynchronous, event-driven model. Unlike traditional web servers that spawn a new process or thread for each connection, NGINX uses a single-threaded approach. It handles multiple connections within one process, employing an event loop to manage connections efficiently. This design significantly reduces overhead and boosts performance, particularly under high traffic loads.
The Event-Driven Model:
The core of NGINX’s performance lies in its event-driven architecture. Instead of creating a new process for each request, NGINX handles all connections within a single process using non-blocking I/O operations. This model enables NGINX to manage tens of thousands of concurrent connections with minimal resource usage.
Process Handling:
NGINX employs a master-worker model:
- Master Process: The master process reads and validates configuration files, manages worker processes, and handles privileged operations.
- Worker Processes: Worker processes handle client requests. Each worker operates independently and can manage thousands of connections simultaneously through asynchronous, non-blocking I/O.
Modules and Extensions:
NGINX’s modular architecture allows for extensive customization. Core modules handle essential features like HTTP processing, while additional modules provide functionalities such as SSL/TLS support, load balancing, and caching. Users can dynamically add or remove modules, tailoring NGINX to their specific needs.
Also Read | What Is Edge Caching?
The NGINX Architecture:
Understanding NGINX’s architecture is crucial for optimizing its performance and leveraging its full potential.
Master and Worker Processes:
NGINX’s architecture consists of a master process and one or more worker processes. The master process controls the worker processes and manages configuration files. Worker processes handle all client requests and can efficiently manage many connections due to the event-driven model.
Event-Driven Model:
The event-driven model underpins NGINX’s performance. The master process delegates work to worker processes, which manage connections using an event loop. This loop handles I/O operations asynchronously, ensuring that the server can manage many connections concurrently without significant resource consumption.
Modules and Extensions:
NGINX’s modular architecture allows for extensive customization. Core modules handle essential features like HTTP processing, while additional modules provide functionalities such as SSL/TLS support, load balancing, and caching. Users can dynamically add or remove modules, tailoring NGINX to their specific needs.
Benefits of NGINX:
NGINX offers numerous advantages that make it a preferred choice for web servers and reverse proxies.
High Performance
NGINX’s non-blocking, event-driven architecture delivers exceptional performance. It handles thousands of simultaneous connections with minimal CPU and memory usage, making it ideal for high-traffic websites and applications.
Scalability
NGINX excels in scalability. It supports horizontal scaling, allowing administrators to add more servers to handle increased traffic. Load balancing features distribute requests across multiple servers, preventing any single server from becoming a bottleneck.
Security
NGINX enhances security through features like SSL/TLS termination, Web Application Firewall (WAF) integration, and rate limiting. It also supports various security headers, such as Content Security Policy (CSP) and HTTP Strict Transport Security (HSTS), which protect against common web vulnerabilities.
Flexibility
NGINX’s modular design and extensive configuration options make it highly flexible. It can serve static content, act as a reverse proxy, load balancer, or HTTP cache, and integrate with various web technologies and frameworks.
Reliability
NGINX is known for its reliability. Its robust architecture ensures high availability and uptime, which is essential for mission-critical applications and high-traffic websites.
Also Read | How to deploy a WordPress website on AWS?
Limitations of NGINX
While NGINX offers numerous advantages, it does have limitations:
Complexity
NGINX’s extensive configuration options can be overwhelming for beginners. Understanding its architecture and mastering its configuration syntax requires time and experience.
Lack of Dynamic Content Processing
NGINX does not natively process dynamic content. It relies on external processors like PHP-FPM (FastCGI Process Manager) to handle dynamic requests. This separation can complicate setup and configuration.
Limited Windows Support
NGINX performs best on Unix-based systems. While it can run on Windows, its performance and stability on this platform are not as robust.
Getting Started With NGINX:
Installation:
Installing NGINX varies by operating system. Here’s a basic guide for popular platforms:
Ubuntu:
sudo apt update

sudo apt install nginx
CentOS:
sudo yum install epel-release

sudo yum install nginx
Basic Configuration:
NGINX’s main configuration file, nginx.conf, resides in /etc/nginx/. The file contains directives defining server behavior. Here’s a basic configuration example:
nginx:
worker_processes auto;
events {
    worker_connections 1024;
}
http {
    server {
        listen 80;
        server_name example.com;
        location / {
            root /usr/share/nginx/html;
            index index.html;
        }
    }

}
Advanced Configuration:
Load Balancing:
To set up load balancing, define an upstream block and reference it in a server block:
nginx:
http {
    upstream backend {
        server backend1.example.com;
        server backend2.example.com;
    }
    server {
        listen 80;
        server_name example.com;
        location / {
            proxy_pass http://backend;
        }
    }
}
Reverse Proxy:
Configure NGINX to act as a reverse proxy by defining the backend server:
nginx:
server {
    listen 80;
    server_name example.com;
    location / {
        proxy_pass http://backend_server;
        proxy_set_header Host $host;
        proxy_set_header X-Real-IP $remote_addr;
        proxy_set_header X-Forwarded-For $proxy_add_x_forwarded_for;
        proxy_set_header X-Forwarded-Proto $scheme;
    }
}
SSL/TLS Configuration:
Secure your site with SSL/TLS by updating your server block:
nginx:
server {
    listen 443 ssl;
    server_name example.com;
    ssl_certificate /etc/ssl/certs/example.com.crt;
    ssl_certificate_key /etc/ssl/private/example.com.key;
    location / {
       proxy_pass http://backend_server;
    }}
Caching Strategies
FastCGI Caching: Enable FastCGI caching for dynamic content
nginx:
fastcgi_cache_path /var/cache/nginx levels=1:2 keys_zone=WORDPRESS:100m inactive=60m;
fastcgi_cache_key "$scheme$request_method$host$request_uri";
server {

    location ~ \.php$ {
        fastcgi_pass unix:/run/php/php7.4-fpm.sock;
        fastcgi_index index.php;
        fastcgi_param SCRIPT_FILENAME $document_root$fastcgi_script_name;
        include fastcgi_params;
        fastcgi_cache WORDPRESS;
        fastcgi_cache_valid 200 60m;
    }
}
- Static Content Caching: Cache static content to improve load times
nginx:
server {
    location / {
        root /var/www/html;
        index index.html index.htm;
    }

    location ~* \.(jpg|jpeg|png|gif|ico|css|js)$ {
        expires 30d;
    }
}
- Security Best Practices
Rate Limiting: Prevent brute force attacks by limiting requests from a single IP
nginx:
http {

    limit_req_zone $binary_remote_addr zone=one:10m rate=1r/s;

    server {
        location /login {
            limit_req zone=one burst=5;
        }
    }
}
Security Headers: Implement security headers to protect against common vulnerabilities
nginx:
server {

    add_header Content-Security-Policy "default-src 'self'";

    add_header X-Content-Type-Options nosniff;

    add_header X-Frame-Options DENY;

    add_header X-XSS-Protection "1; mode=block";

}
- Monitoring and Maintenance
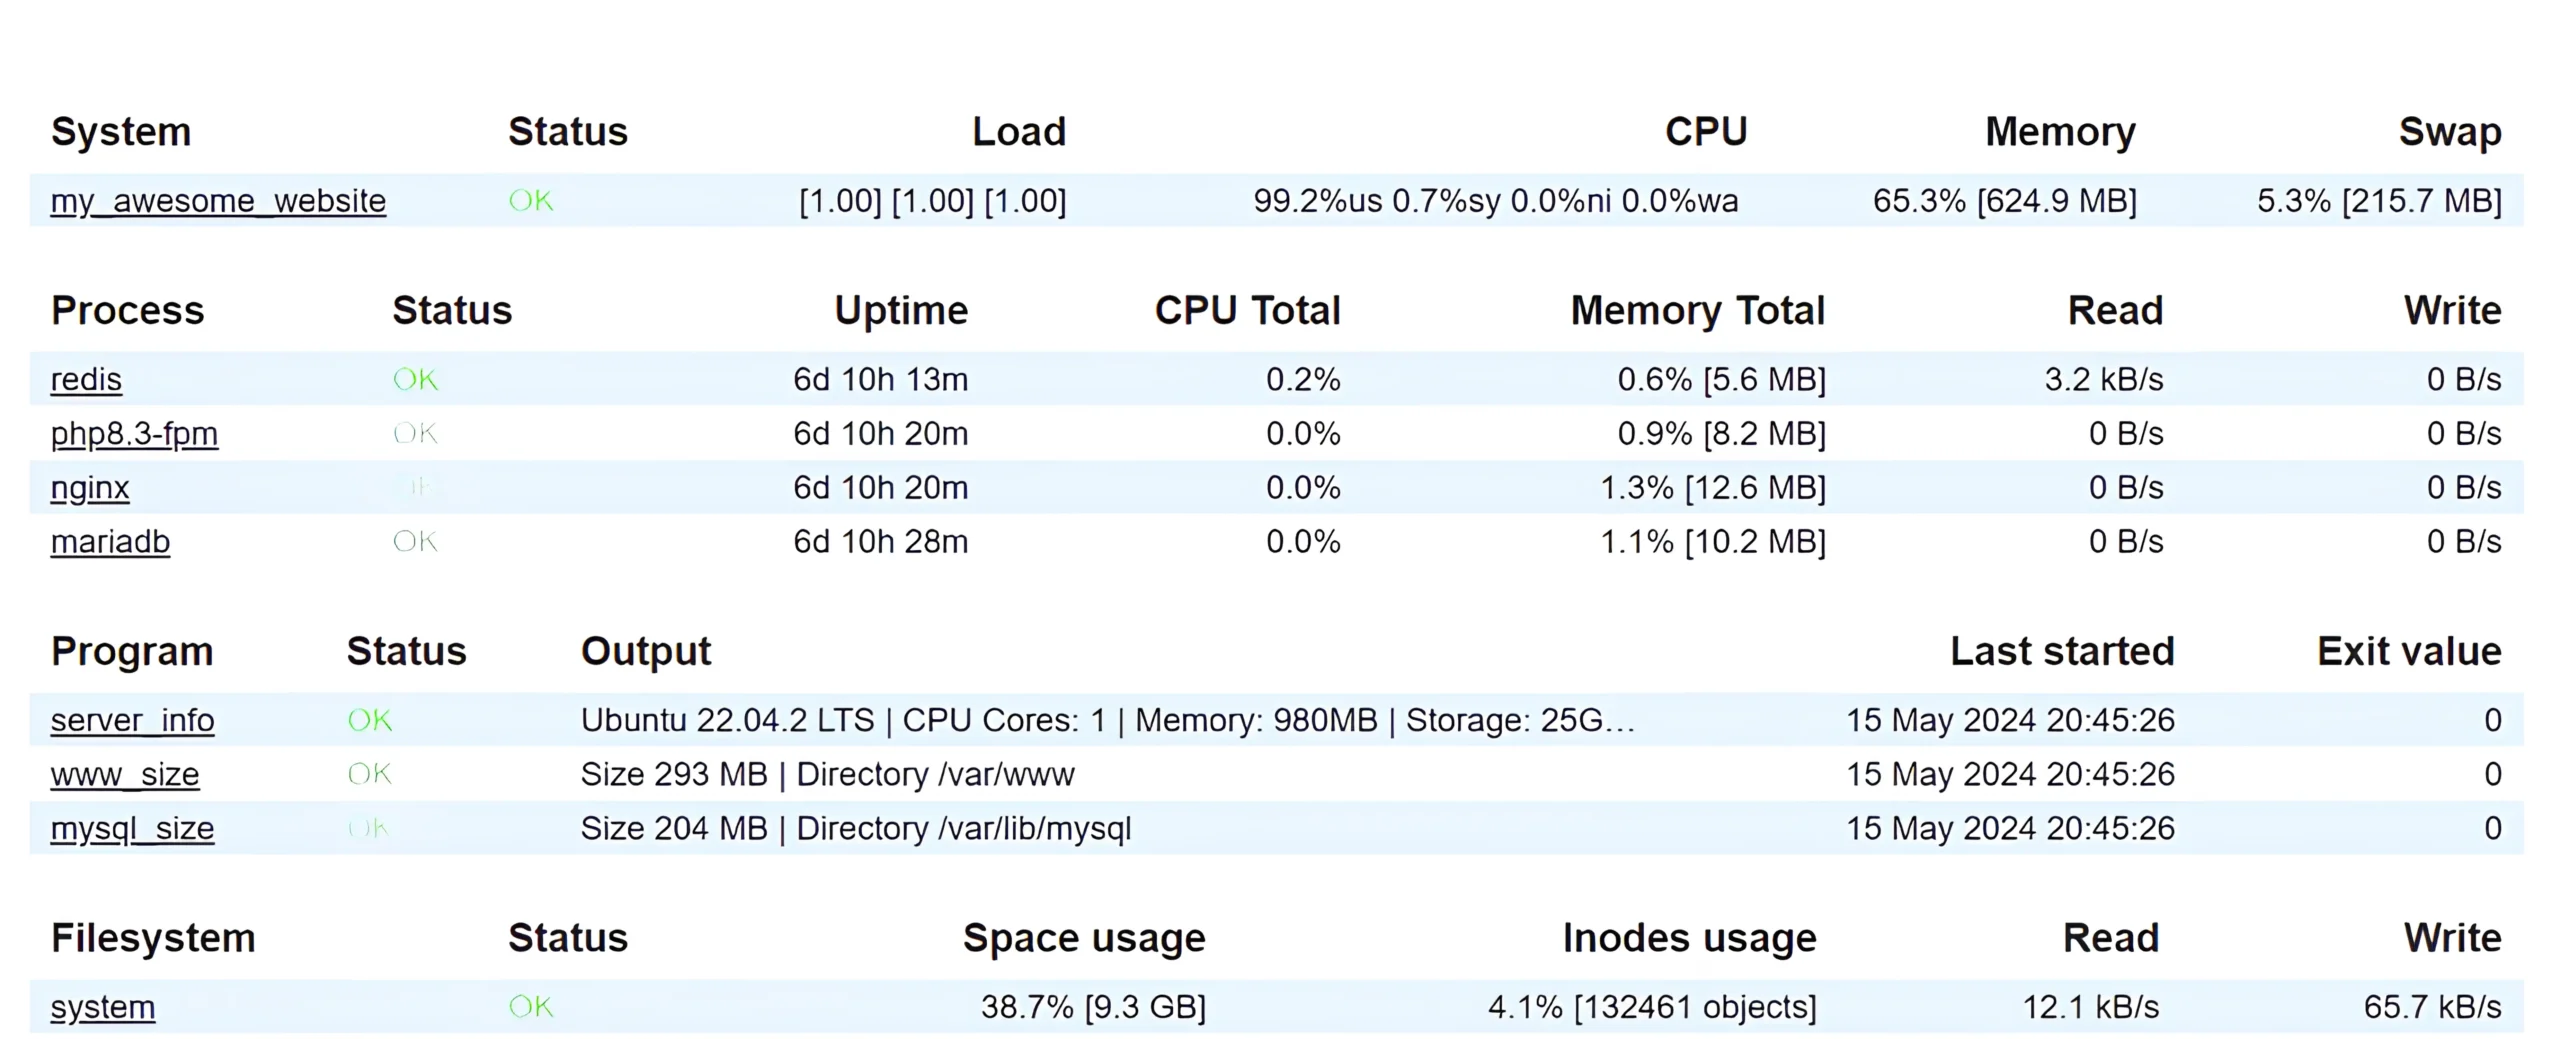
Logging: Enable logging to monitor and troubleshoot NGINX performance:
nginx:
http {
    log_format main '$remote_addr - $remote_user [$time_local] "$request" '
                      '$status $body_bytes_sent "$http_referer" '
                      '"$http_user_agent" "$http_x_forwarded_for"';
    access_log /var/log/nginx/access.log main;
    error_log /var/log/nginx/error.log warn;
}
- Performance Tuning
Regularly tune NGINX settings for optimal performance:
- Worker Connections: Increase worker_connections based on traffic.
- Buffer Sizes: Adjust client_body_buffer_size, client_header_buffer_size, and client_max_body_size.
- Timeouts: Set appropriate client_body_timeout, client_header_timeout, and keepalive_timeout.
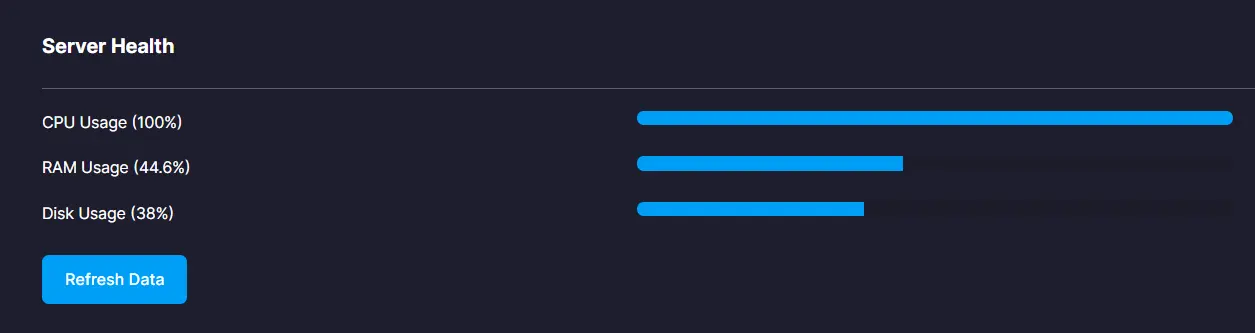
Also Read | What is Server Monitoring?
Use Cases
NGINX is an incredibly versatile tool that serves a wide range of use cases, making it an essential component in various web infrastructure scenarios. Below, we dive into some specific use cases where NGINX excels, showcasing its flexibility and power.
High-Traffic Websites
NGINX’s performance and scalability make it ideal for high-traffic websites. High-profile companies like Netflix, LinkedIn, and WordPress.com use NGINX to serve millions of users daily. Here’s why:
- Efficient Request Handling: NGINX can handle thousands of simultaneous connections using a minimal amount of memory and CPU. This efficiency is crucial for websites experiencing high traffic volumes.
- Load Balancing: NGINX can distribute incoming traffic across multiple servers, ensuring no single server becomes overwhelmed. This capability is vital for maintaining site performance and reliability under heavy load.
- Caching: NGINX’s caching mechanisms reduce server load and improve response times by storing copies of frequently requested content. This feature significantly enhances the user experience during traffic spikes
Reverse Proxy and Load Balancing
NGINX is widely used as a reverse proxy and load balancer, distributing client requests across multiple backend servers. This setup improves application performance, reliability, and security.
- Reverse Proxy: NGINX forwards client requests to backend servers and returns the responses to clients. This role allows it to handle tasks like SSL termination, load distribution, and content caching.
- Load Balancing: NGINX supports various load balancing algorithms, including round-robin, least connections, and IP hash. This flexibility allows administrators to choose the best strategy for their specific application needs.
- Health Checks: NGINX can monitor the health of backend servers and automatically remove unresponsive servers from the pool, ensuring high availability and reliability.
Content Delivery Networks (CDNs)
Content Delivery Networks (CDNs) leverage NGINX’s caching and load balancing capabilities to deliver content quickly and efficiently to users worldwide.
- Edge Caching: NGINX can cache static content at edge servers, reducing latency by serving content from locations closer to the user.
- Content Optimization: NGINX can compress and optimize content before delivering it to users, improving load times and reducing bandwidth usage.
- SSL/TLS Termination: NGINX handles SSL/TLS termination at the edge, offloading this resource-intensive task from origin servers and ensuring secure connections.
Microservices Architectures
In microservices architectures, NGINX serves as an API gateway, managing traffic between microservices and providing critical features like load balancing, authentication, and SSL termination.
- API Gateway: NGINX can route requests to various microservices based on URI patterns or other request attributes. This capability simplifies service discovery and load balancing in a microservices environment.
- Security: NGINX can enforce security policies, including rate limiting and access control, protecting microservices from abuse and ensuring that only authorized clients can access them.
- Service Mesh: NGINX can integrate with service mesh technologies, providing traffic management, security, and observability for microservices communication.
WordPress Hosting
NGINX optimizes WordPress hosting by improving load times, handling more traffic, and enhancing security. Its caching capabilities and efficient processing of static content significantly boost WordPress performance.
- Static Content Serving: NGINX excels at serving static content like images, CSS, and JavaScript files, freeing up PHP and database resources for dynamic content generation.
- FastCGI Caching: By caching PHP responses, NGINX reduces the load on PHP-FPM and MySQL, significantly improving site performance.
- Security Enhancements: NGINX can implement security features such as rate limiting, blocking malicious requests, and mitigating DDoS attacks, protecting WordPress sites from common threats.
E-commerce Websites
E-commerce websites benefit from NGINX’s performance, security, and scalability features, ensuring a smooth and secure shopping experience for users.
- High Availability: NGINX ensures high availability through load balancing and automatic failover, keeping e-commerce sites up and running during peak traffic periods.
- SSL/TLS Termination: NGINX handles SSL/TLS termination, ensuring secure transactions and protecting sensitive customer data.
- Caching and Compression: NGINX reduces load times by caching static and dynamic content and compressing responses, enhancing the user experience and boosting sales.
Media Streaming
NGINX is an excellent choice for media streaming applications, providing the performance and reliability needed to deliver high-quality streaming experiences.
- Live Streaming: NGINX supports protocols like HLS (HTTP Live Streaming) and DASH (Dynamic Adaptive Streaming over HTTP), enabling high-performance live streaming.
- Video on Demand: NGINX can cache and serve video content efficiently, reducing latency and improving playback quality for on-demand streaming services.
- Bandwidth Management: NGINX can manage bandwidth and enforce rate limits, ensuring fair resource allocation and preventing any single user from consuming excessive bandwidth.
IoT and Real-Time Applications
For IoT and real-time applications, NGINX provides the performance and scalability required to handle large volumes of data and real-time communication.
- WebSocket Proxying: NGINX supports WebSocket proxying, enabling real-time communication between clients and servers, essential for IoT and real-time applications.
- Scalability: NGINX’s ability to handle thousands of simultaneous connections makes it ideal for IoT applications that need to process data from numerous devices.
- Security: NGINX can implement security measures such as SSL/TLS encryption, rate limiting, and IP whitelisting, protecting IoT devices and data from unauthorized access.
Development and Testing Environments
NGINX is also a valuable tool in development and testing environments, providing a lightweight and flexible solution for developers.
- Local Development: Developers can use NGINX to create a local development environment that mimics production, ensuring that applications behave consistently across environments.
- Testing: NGINX’s reverse proxy capabilities allow developers to test applications behind a proxy, simulating real-world scenarios and identifying potential issues before deployment.
- Continuous Integration/Continuous Deployment (CI/CD): NGINX can integrate with CI/CD pipelines, providing automated testing, deployment, and rollback capabilities, streamlining the development process.
Conclusion
NGINX stands out as a versatile, high-performance web server and reverse proxy, essential for modern web infrastructure. Its robust architecture, scalability, and security features make it ideal for WordPress hosting and server management. By mastering NGINX, you can ensure your websites and applications remain fast, reliable, and secure, meeting the demands of today’s digital landscape. Whether you’re handling high-traffic websites or complex cloud environments, NGINX offers the tools and flexibility needed to excel.
Recent Post

Mastering Load Balancing for Optimal WordPress…
Enhance your WordPress site's performance and reliability…

Cross-Site Scripting (XSS): A Comprehensive Guide
Discover the ins and outs of Cross-Site…

Understanding Web Application Firewall (WAF)
Explore Web Application Firewalls (WAFs): how they…